
Apply themes and service branding
Set the theme early. It fixes the deck’s color roles, fonts, spacing, and effects before you start polishing individual slides.
1. Open Theme
Section titled “1. Open Theme”Click Theme in the top toolbar.
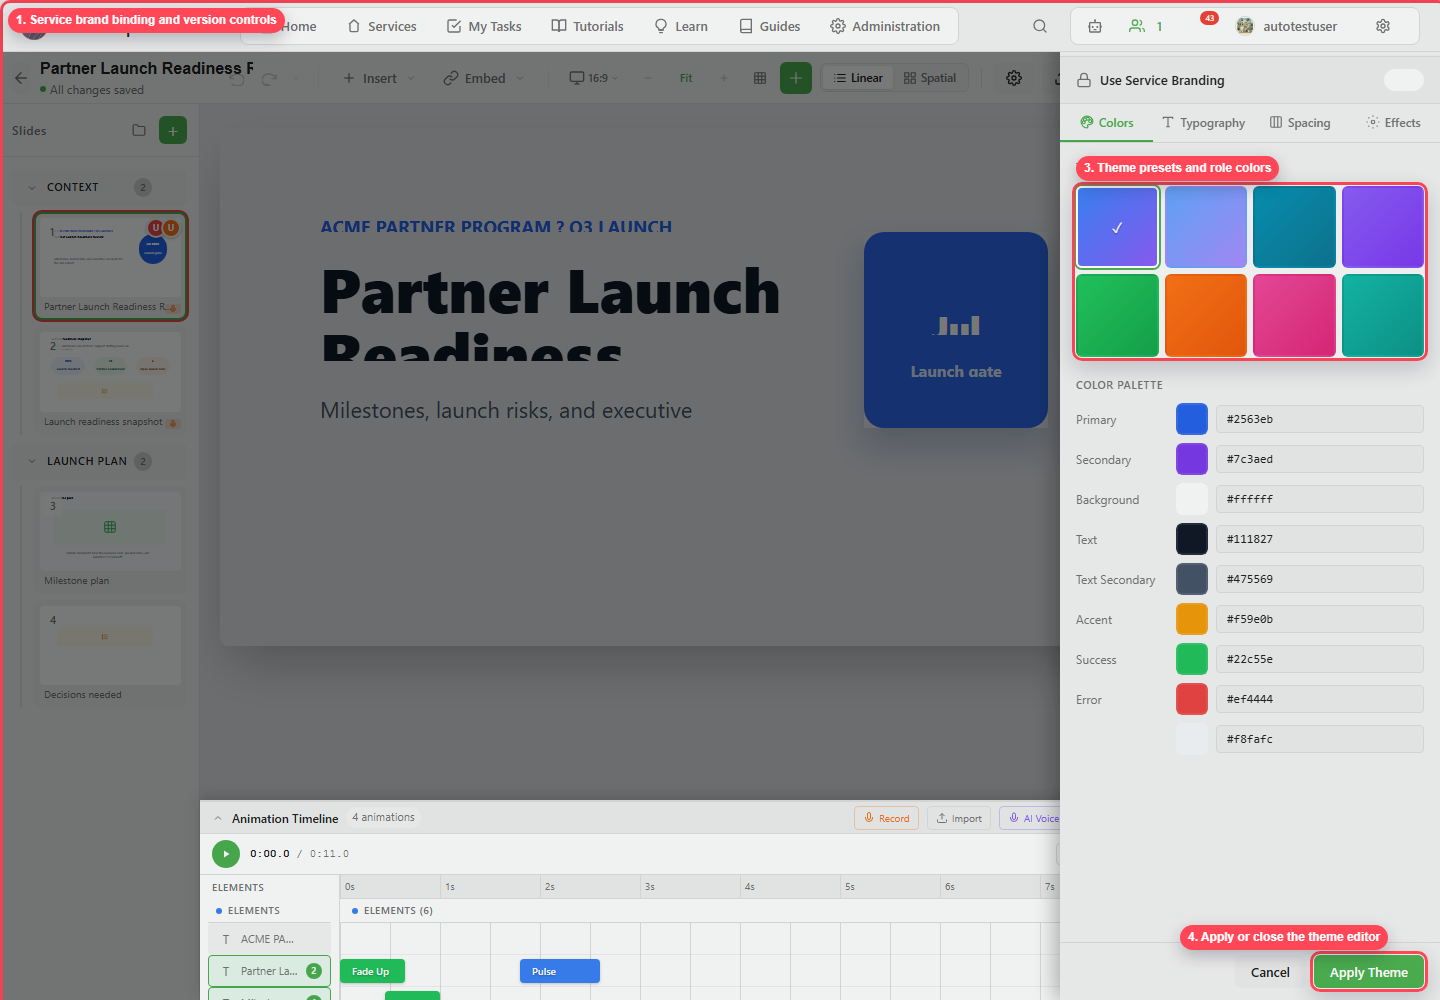
2. Decide whether to use service branding
Section titled “2. Decide whether to use service branding”Turn on Use Service Branding when the deck should follow the service brand kit. If the brand has versions, choose the intended version.
3. Pick a color preset
Section titled “3. Pick a color preset”Choose a preset when you want a quick starting direction. A preset updates the role colors that slide elements and defaults draw from.
4. Tune role colors
Section titled “4. Tune role colors”Adjust role colors such as primary, secondary, background, text, text secondary, accent, success, and error. When the whole deck should change, change the role color rather than each element in turn.
5. Set typography
Section titled “5. Set typography”Use the Typography tab to choose heading, body, and code fonts and tune type scale.
6. Set spacing and effects
Section titled “6. Set spacing and effects”Use Spacing to set the deck’s spacing scale. Use Effects for corner radius, shadows, and transition speed.
7. Apply the theme
Section titled “7. Apply the theme”Click Apply Theme. Then check the title slides, the densest slides, and any charts to see how they look under the new theme.
8. Publish after brand-sensitive changes
Section titled “8. Publish after brand-sensitive changes”When a theme change is part of a reviewed milestone, publish a version with a comment such as Applied service brand theme. That records how the deck looked once the brand was applied. The themes reference lists every control in the theme editor.