
Use the Mixer
The Mixer puts every track side by side, so you balance the whole project in one view instead of one track at a time. Open it with Mixer in the transport bar at the bottom of the editor.
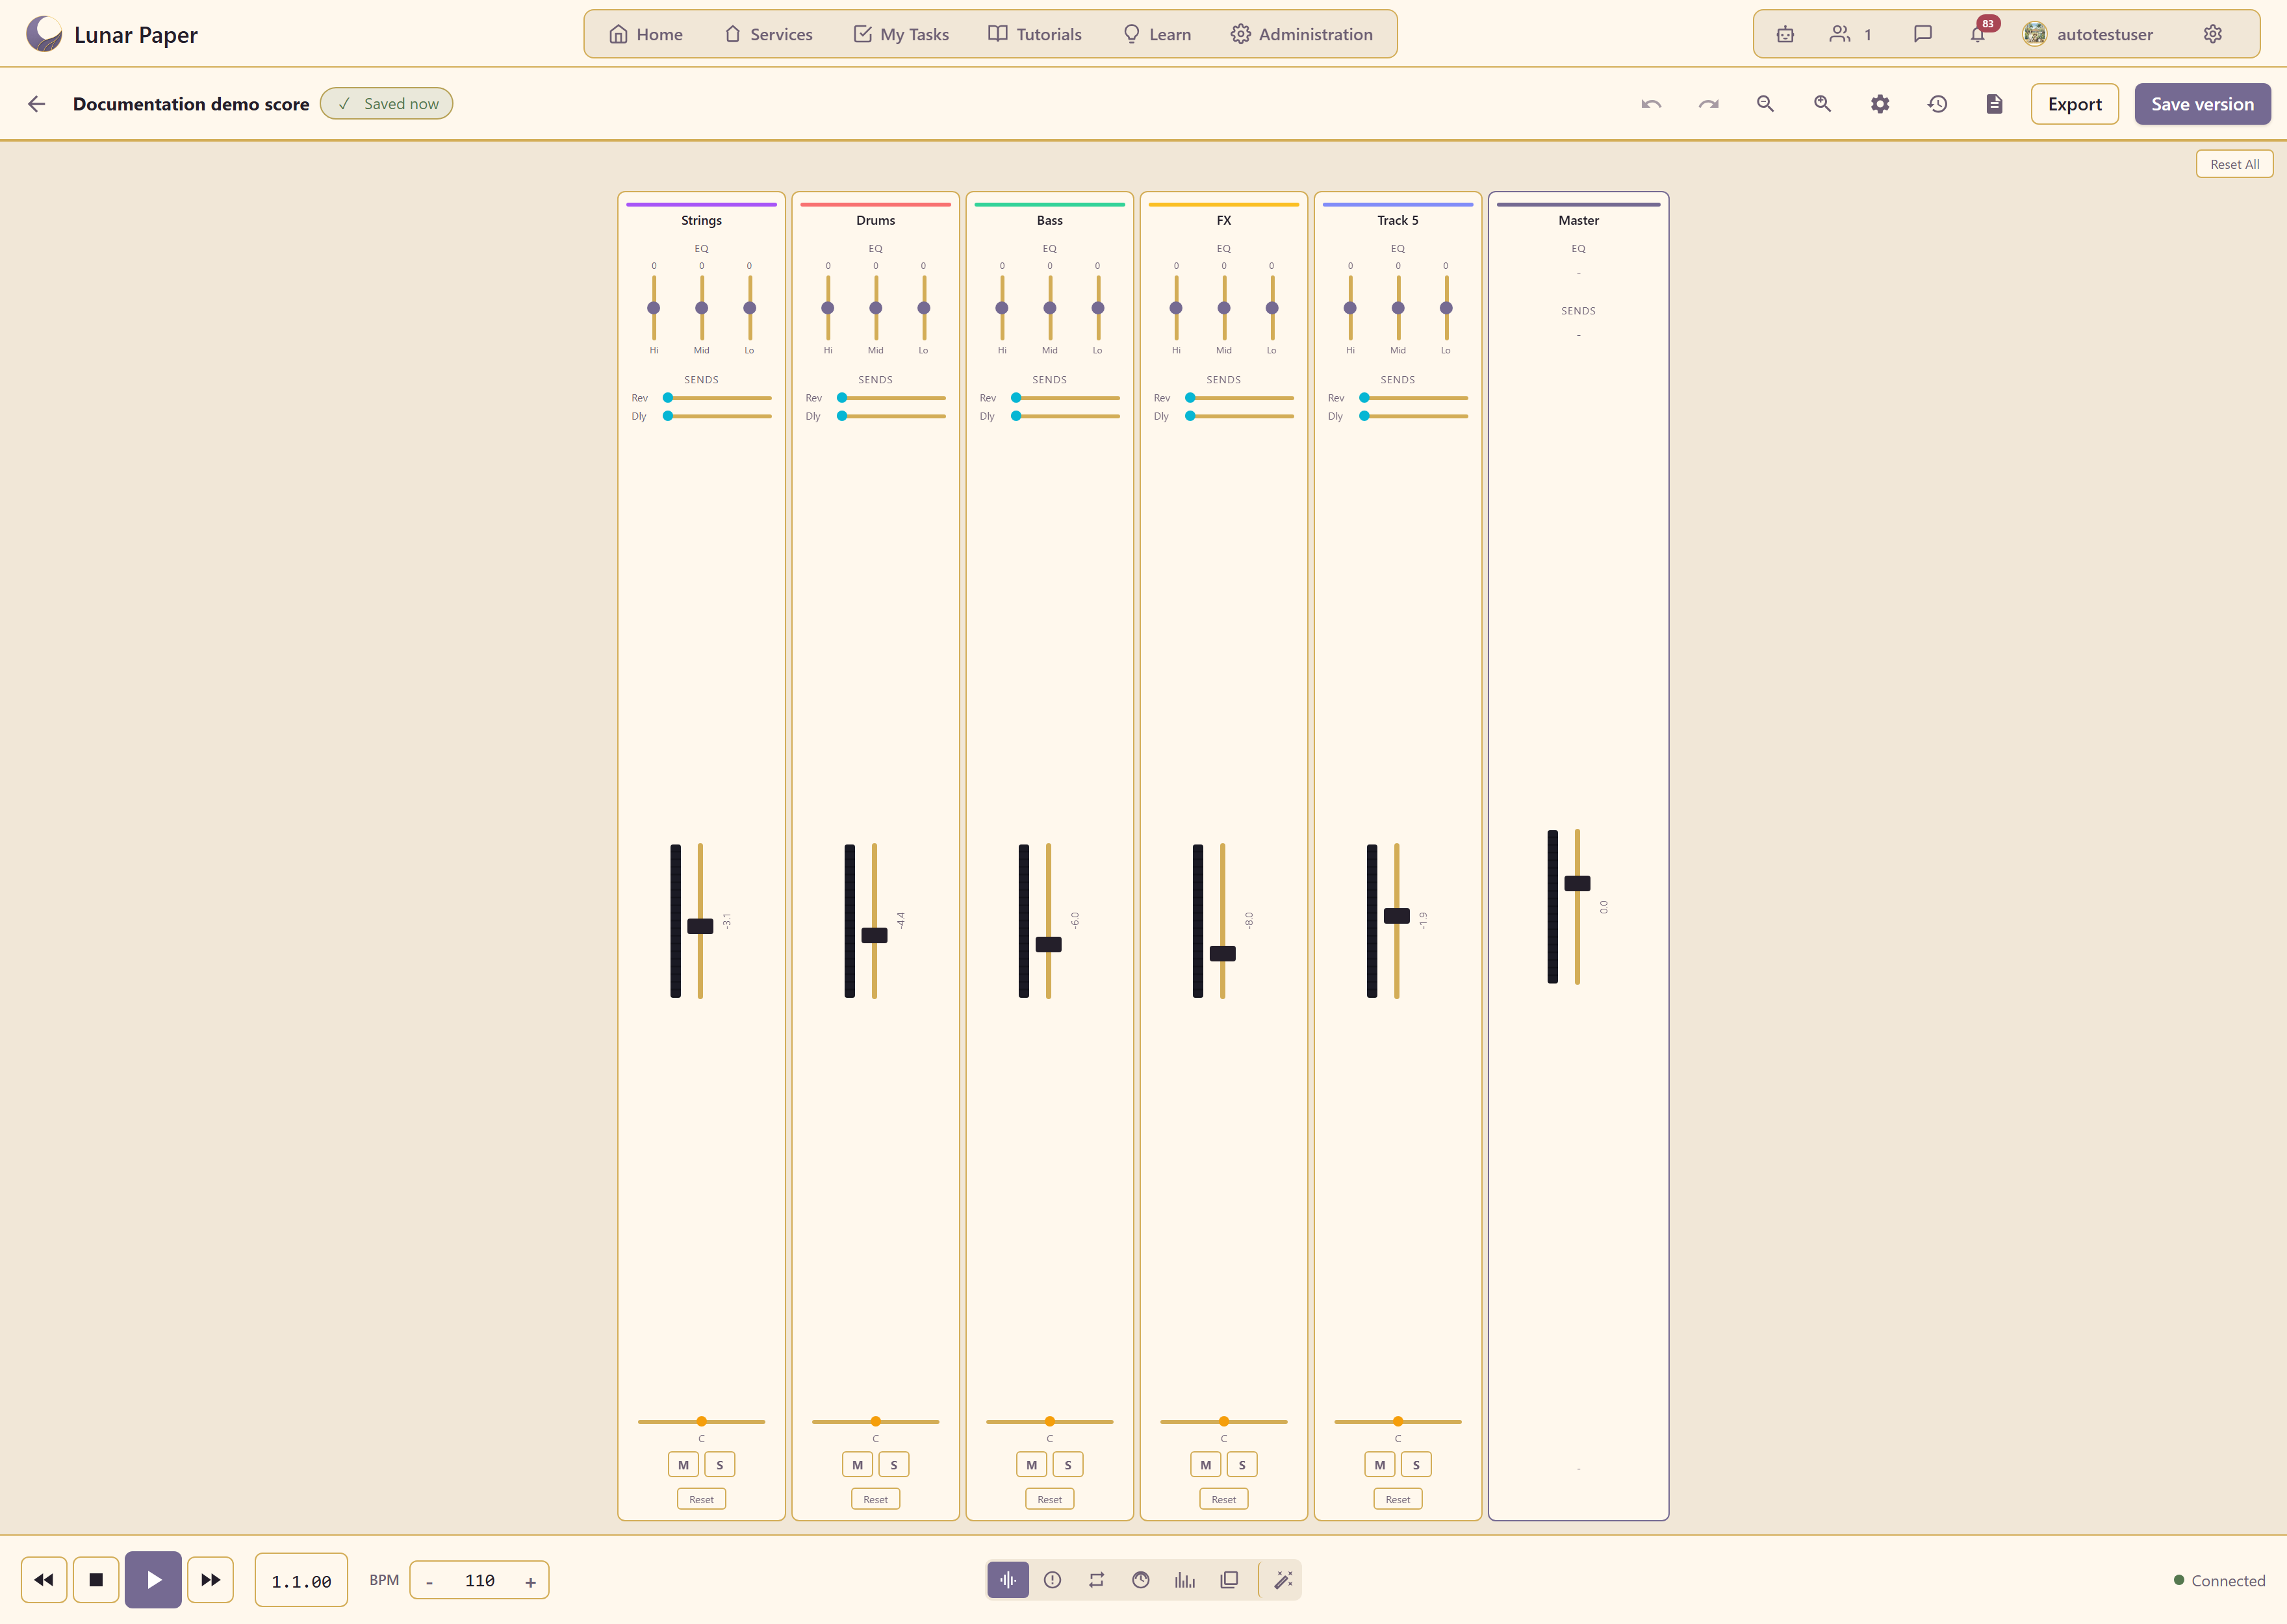
Each track gets a vertical channel strip, and a Master strip sits at the right-hand end.
What is on a channel strip
Section titled “What is on a channel strip”Top to bottom:
EQ — three bands, Hi, Mid, and Lo, each starting at 0.
Sends — Rev for reverb and Dly for delay.
Fader — the track’s level, with its value in decibels shown beside it.
Pan — a horizontal slider under the fader, centred at C.
M and S — mute and solo.
Reset — returns that one strip to its defaults. Reset All, top right, does the same for every strip.
Balance the levels first
Section titled “Balance the levels first”Get the relative levels right before touching anything else. EQ and effects on an unbalanced mix are wasted work, because the balance changes what you hear.
Drag each fader and watch the decibel readout. Aim for the loudest moments to stay below clipping, and leave headroom on the master for the export.
Start by setting the most important element — usually the lead or the kick — then bring everything else up against it.
Shape tone with EQ
Section titled “Shape tone with EQ”The three bands are broad by design, which makes them useful for the common case: something is too boomy, too boxy, or too harsh.
Cut before you boost. If two instruments are competing, cutting the frequency each does not need separates them more cleanly than boosting the frequency each does, and it leaves headroom instead of eating it.
Use the sends for space
Section titled “Use the sends for space”Rev and Dly feed shared reverb and delay rather than putting an effect on each track. That is the point of sends: several tracks can sit in the same space, and one adjustment changes all of them.
Send a little of several tracks rather than a lot of one. A mix where everything shares a small amount of the same reverb sounds like one room; a mix where one track is drenched sounds like a mistake.
Keep the low end dry. Reverb on bass and kick muddies a mix faster than anything else.
Pan for width
Section titled “Pan for width”Keep the low-frequency and lead elements at or near centre. Spread rhythm parts, pads, and percussion left and right for width.
For anything beyond left-to-right, use 3D spatial audio, which places a track by azimuth, elevation, and distance rather than a single pan value.
Mute and solo while you work
Section titled “Mute and solo while you work”S isolates a track so you can hear what you are actually adjusting. M takes one out so you can hear whether it was contributing anything.
Both are working tools rather than settings — check the state of every mute before you export, because a muted track exports silent.
The master strip
Section titled “The master strip”The Master strip carries the output of everything. Use it for the final level, and leave headroom rather than pushing it to the ceiling.
If the master is clipping, pull the channel faders down rather than the master. Turning down the master hides the clipping in the mix without fixing it.
After the mix
Section titled “After the mix”Use 3D spatial audio goes beyond panning and places tracks around the listener. Browse and apply presets saves a mixer setup for reuse. Export audio renders the balanced result.