
Generate in-between frames
Hand-drawing every frame of an animation is slow. The Tween generator builds in-between frames from two keyframes you’ve already drawn, which can fill a walk cycle, smooth an attack, or stretch an idle. Used on the right kind of motion it saves time, and used on the wrong kind it produces smears you have to clean up by hand.
What tweening does
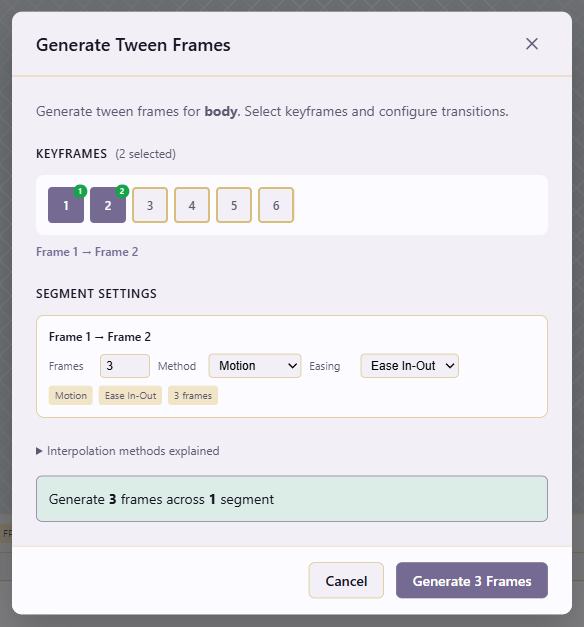
Section titled “What tweening does”The generator works between two keyframes on the same layer. It looks at the pixel content of the start and end frames and produces intermediate frames that transition between them. You choose the method, the easing, and how many frames to generate.
1. Set up two keyframes
Section titled “1. Set up two keyframes”On one layer, draw the start pose on frame N and the end pose on frame M, with empty frames between them. The generator will fill the gap. If you’re animating a character, do this on one layer at a time (body, then outfit, then equipment) because a tween only sees one layer.
2. Open the Tween generator
Section titled “2. Open the Tween generator”Click the Tween button on that layer’s row in the timeline. The dialog opens with method, easing, and frame count options.
3. Pick a method
Section titled “3. Pick a method”There are three methods, each suited to different cases.
Crossfade blends the pixel content of the two keyframes, dissolving one into the other over the generated frames. It’s the safest choice for organic shapes (a character’s body, a creature’s silhouette) because it never tries to interpret motion it can’t model. The trade-off is that it can look ghostly mid-transition, with both poses visible at once.
Motion attempts to detect shapes in the two keyframes and move them across the intermediate frames. It’s the right choice when an object clearly translates across the canvas, such as a coin sliding left to right or an arm sweeping. It fails when shapes deform or rotate heavily, producing smears where it misinterprets the motion.
Hybrid uses motion where it can and falls back to blending where it can’t. It’s a good default when you’re not sure, because it gets the easy motion right and degrades gracefully on the hard parts.
4. Pick an easing
Section titled “4. Pick an easing”Easing changes how the motion accelerates. Linear moves at constant speed, which looks mechanical (a piston, a conveyor). Ease In starts slow and accelerates. Ease Out decelerates toward the end, which suits things coming to rest. Ease In Out is slow at both ends, the default for most organic motion.
5. Generate and review
Section titled “5. Generate and review”Generate the frames, then play the range with Space. Watch for ghosting (a sign Crossfade is the wrong choice here), smearing (Motion guessing wrong), or timing that feels off (try a different easing).
When to tween
Section titled “When to tween”Tweening suits motion that’s continuous and predictable: a coin spinning, an item sliding, a character’s limb sweeping through an arc, an idle that breathes in and out. In those cases the in-between frames are genuinely tedious to draw by hand and the generator gets them right.
Tweening hurts on motion that’s expressive or discontinuous. A sword swing has anticipation, a snap, and follow-through that no generator can infer from two key poses. A changing facial expression has the same problem. In those cases the tweened result is a smear, and cleaning it up takes longer than drawing the frames would have. If the motion cannot be described as a direct translation from one position to another, tweening is the wrong tool.
Cleanup
Section titled “Cleanup”Generated frames are real pixels, so you can edit them normally. The most common cleanup is removing ghost pixels left by Crossfade. Switch to the Eraser and clear the half-opacity pixels that shouldn’t be there. For Motion smears, redraw the silhouette on the affected frames using the Contour tool, which keeps edges sharp.
Once the range looks right, tag it so you can export it on its own. See Slice animations with tags.