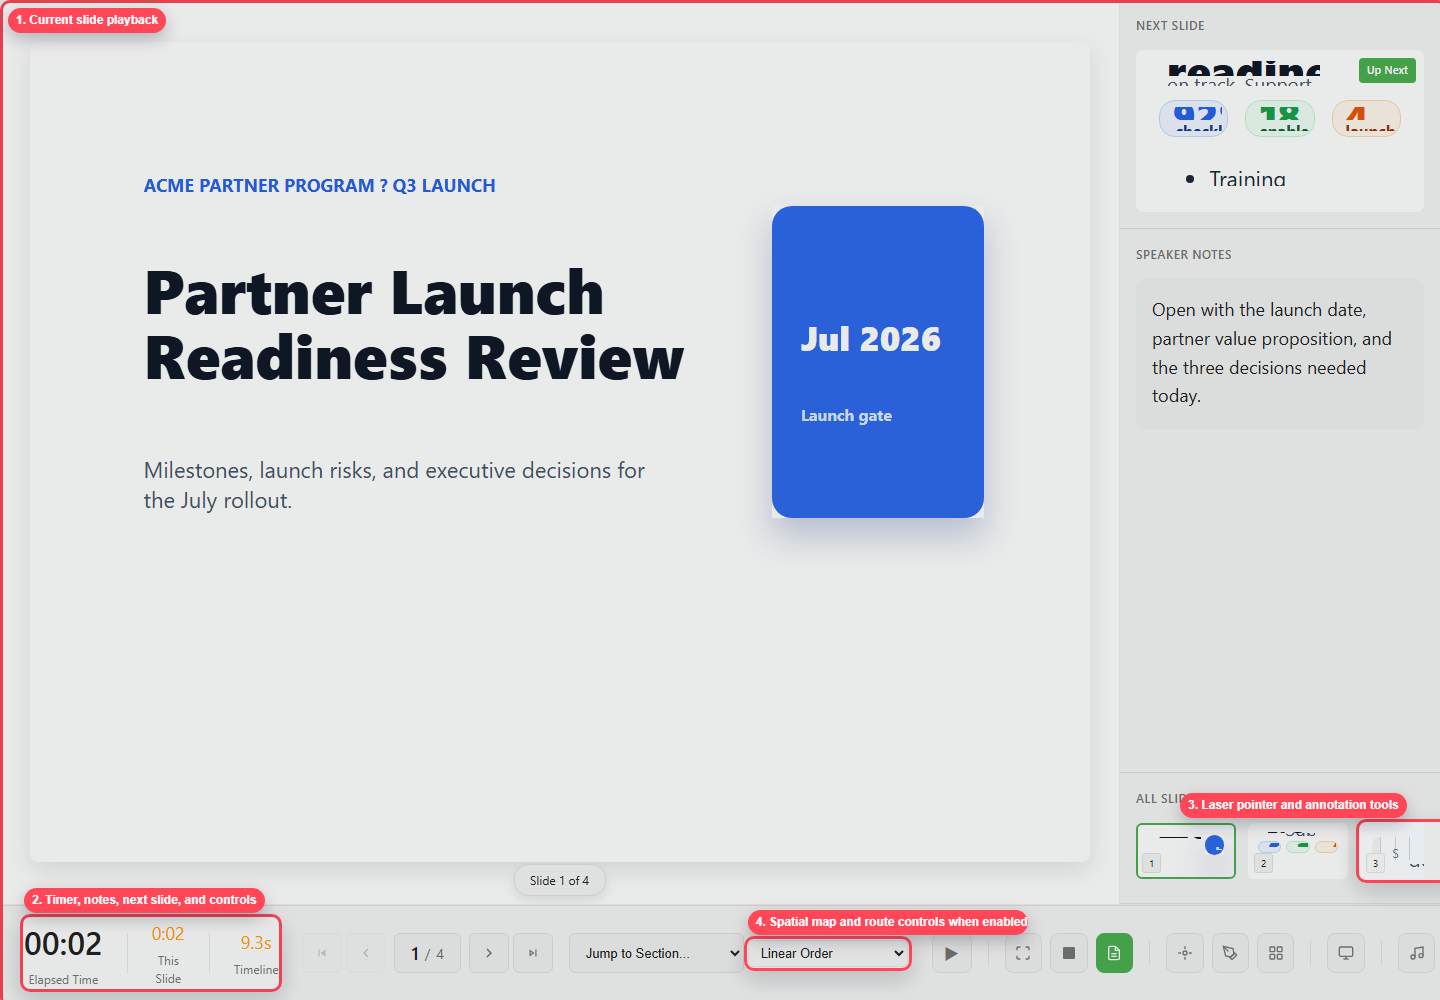
Plan a spatial presentation
Spatial mode lays the whole deck out as a map rather than a list. Use it when one deck needs more than one route through it, or when how the sections relate to each other matters.
1. Start from a structured deck
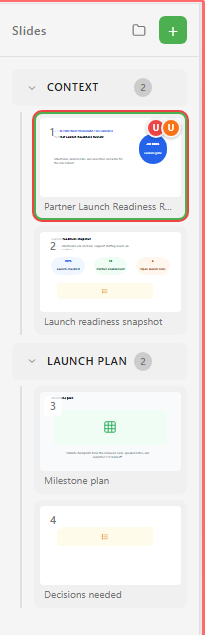
Section titled “1. Start from a structured deck”Create sections and slide titles before you switch to spatial mode. Planning the routes is easier when each slide already has a clear job. Create a presentation from a template covers that first structure.
2. Switch to Spatial
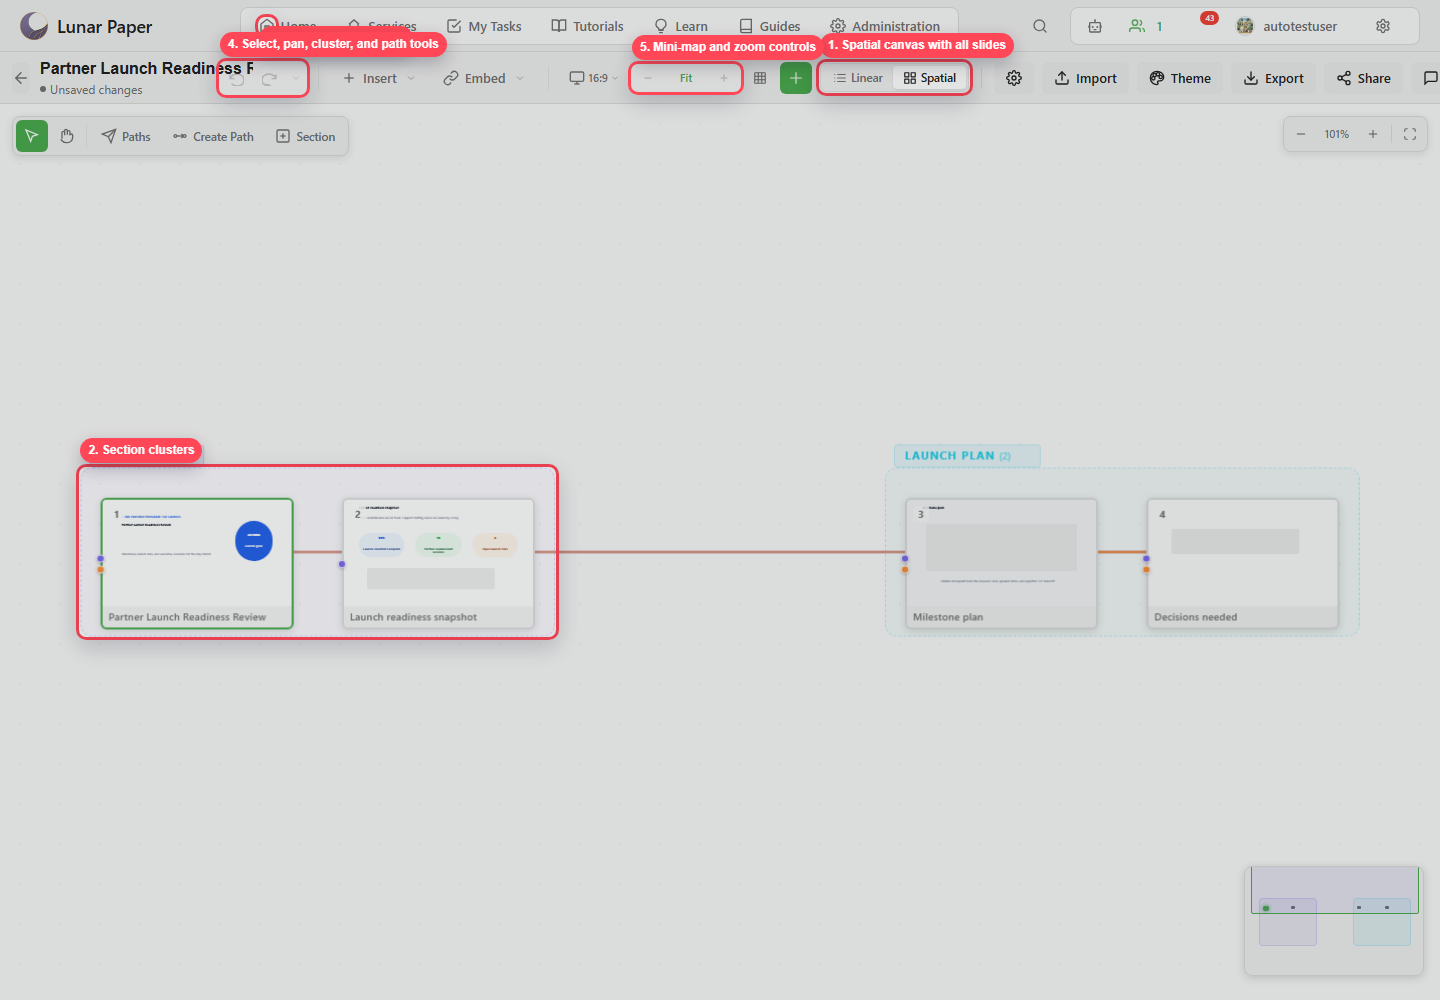
Section titled “2. Switch to Spatial”Click Spatial in the top toolbar. The editor switches from a single-slide canvas to a map of all slides.
3. Arrange slides
Section titled “3. Arrange slides”Drag slide thumbnails on the spatial canvas. Place related slides near one another, and leave room for route lines so reviewers can see the structure.
4. Use clusters for sections
Section titled “4. Use clusters for sections”Create or update clusters to stand for sections such as Context, Launch Plan, or Appendix. Clusters keep the deck’s structure clear when you zoom out.
5. Pan and zoom
Section titled “5. Pan and zoom”Use the spatial zoom controls, mouse wheel, and mini-map to move around large decks. Use fit-to-view after large rearrangements.
6. Open Flight Paths
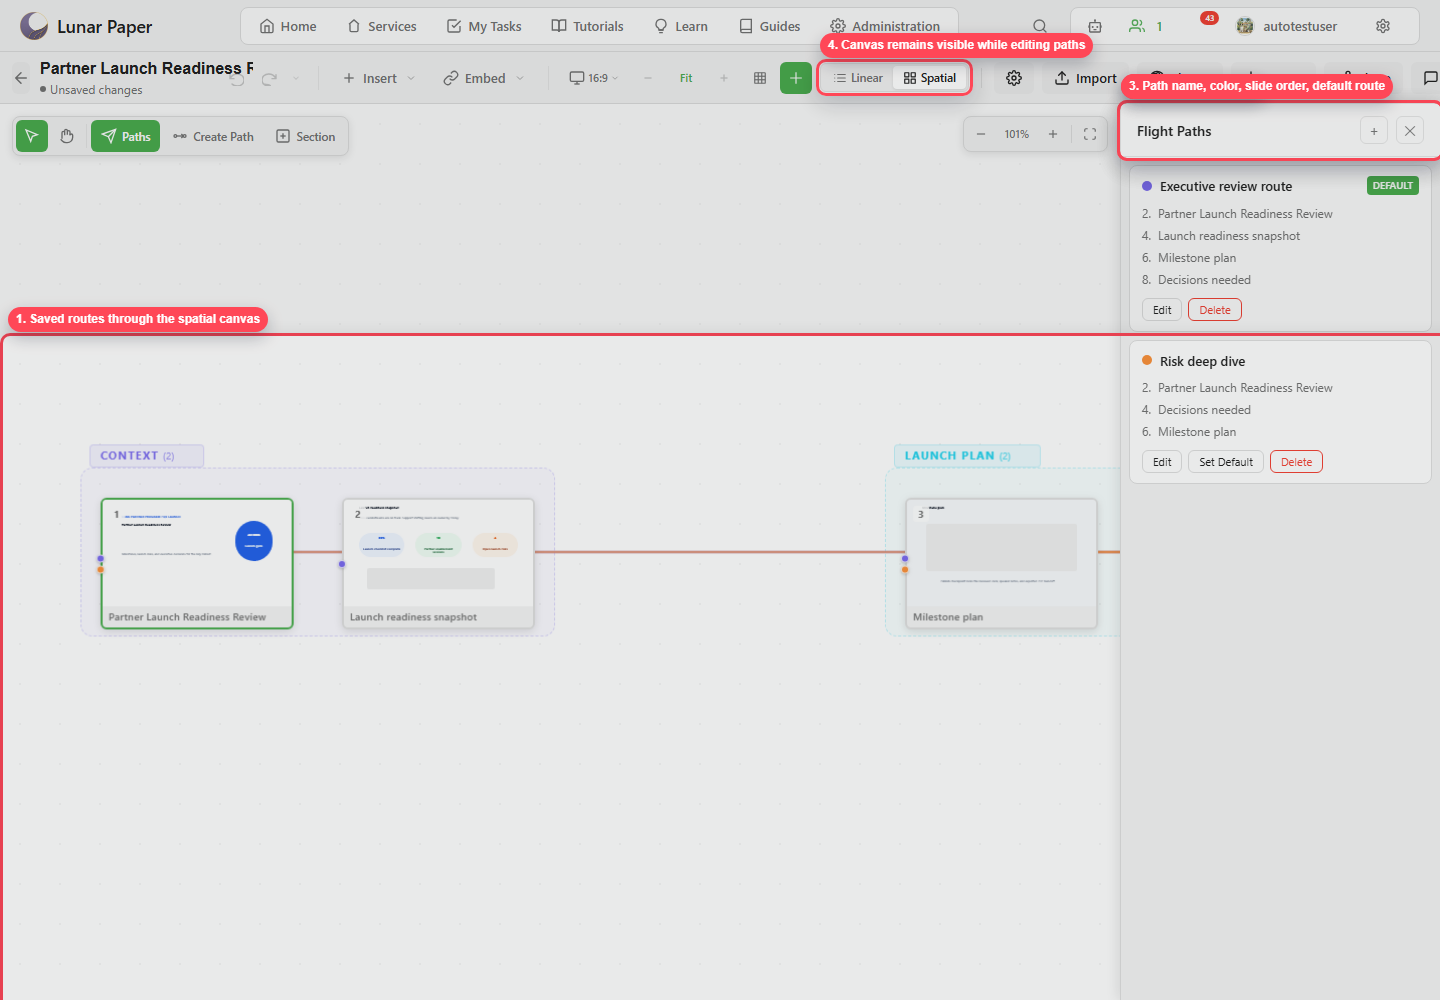
Section titled “6. Open Flight Paths”Click Paths to open the flight path editor. A flight path is an ordered route through selected slides.
7. Create a route
Section titled “7. Create a route”Click add or create path. Name the route for the audience, choose a color, and add slides in the order the presenter should visit them.
8. Build alternate routes
Section titled “8. Build alternate routes”Create additional paths for different delivery needs. For example:
Executive review routefor the shortest decision path.Risk deep divefor a more detailed operational review.Training routefor onboarding or enablement.
9. Mark the default path
Section titled “9. Mark the default path”Set the main route as the default so presenter mode starts on the sequence you expect.
10. Rehearse with the route
Section titled “10. Rehearse with the route”Open Present, then use the route controls or the spatial map to move between clusters as you deliver. Rehearse each route you plan to offer, so you know every one of them still makes sense on its own.