
Connect a source
Connecting a source is one wizard, but it has two quite different paths through it, and picking the wrong one leaves you maintaining a duplicate.
Before you start
Section titled “Before you start”Creating a new source needs the platform admin role. Linking an existing one does not. If the wizard shows you Link Existing entries but the create form refuses to save, that is the distinction you are running into.
Open the wizard
Section titled “Open the wizard”In the workspace, choose + beside CONNECTIONS.
The wizard opens on three modes across the top: Data Sources, File Upload, and External API.
Check Link Existing first
Section titled “Check Link Existing first”Scroll past the connector grid to Link Existing. It lists every source already on the platform, each with a Link button.
If the database you need is there, link it. You get the same tables without a second set of credentials to rotate, and without a second thing that can go offline.
Only create a new source when nothing existing points at the database you want.
Pick a connector
Section titled “Pick a connector”The grid is grouped into Self Hosted, Cloud, and Custom.
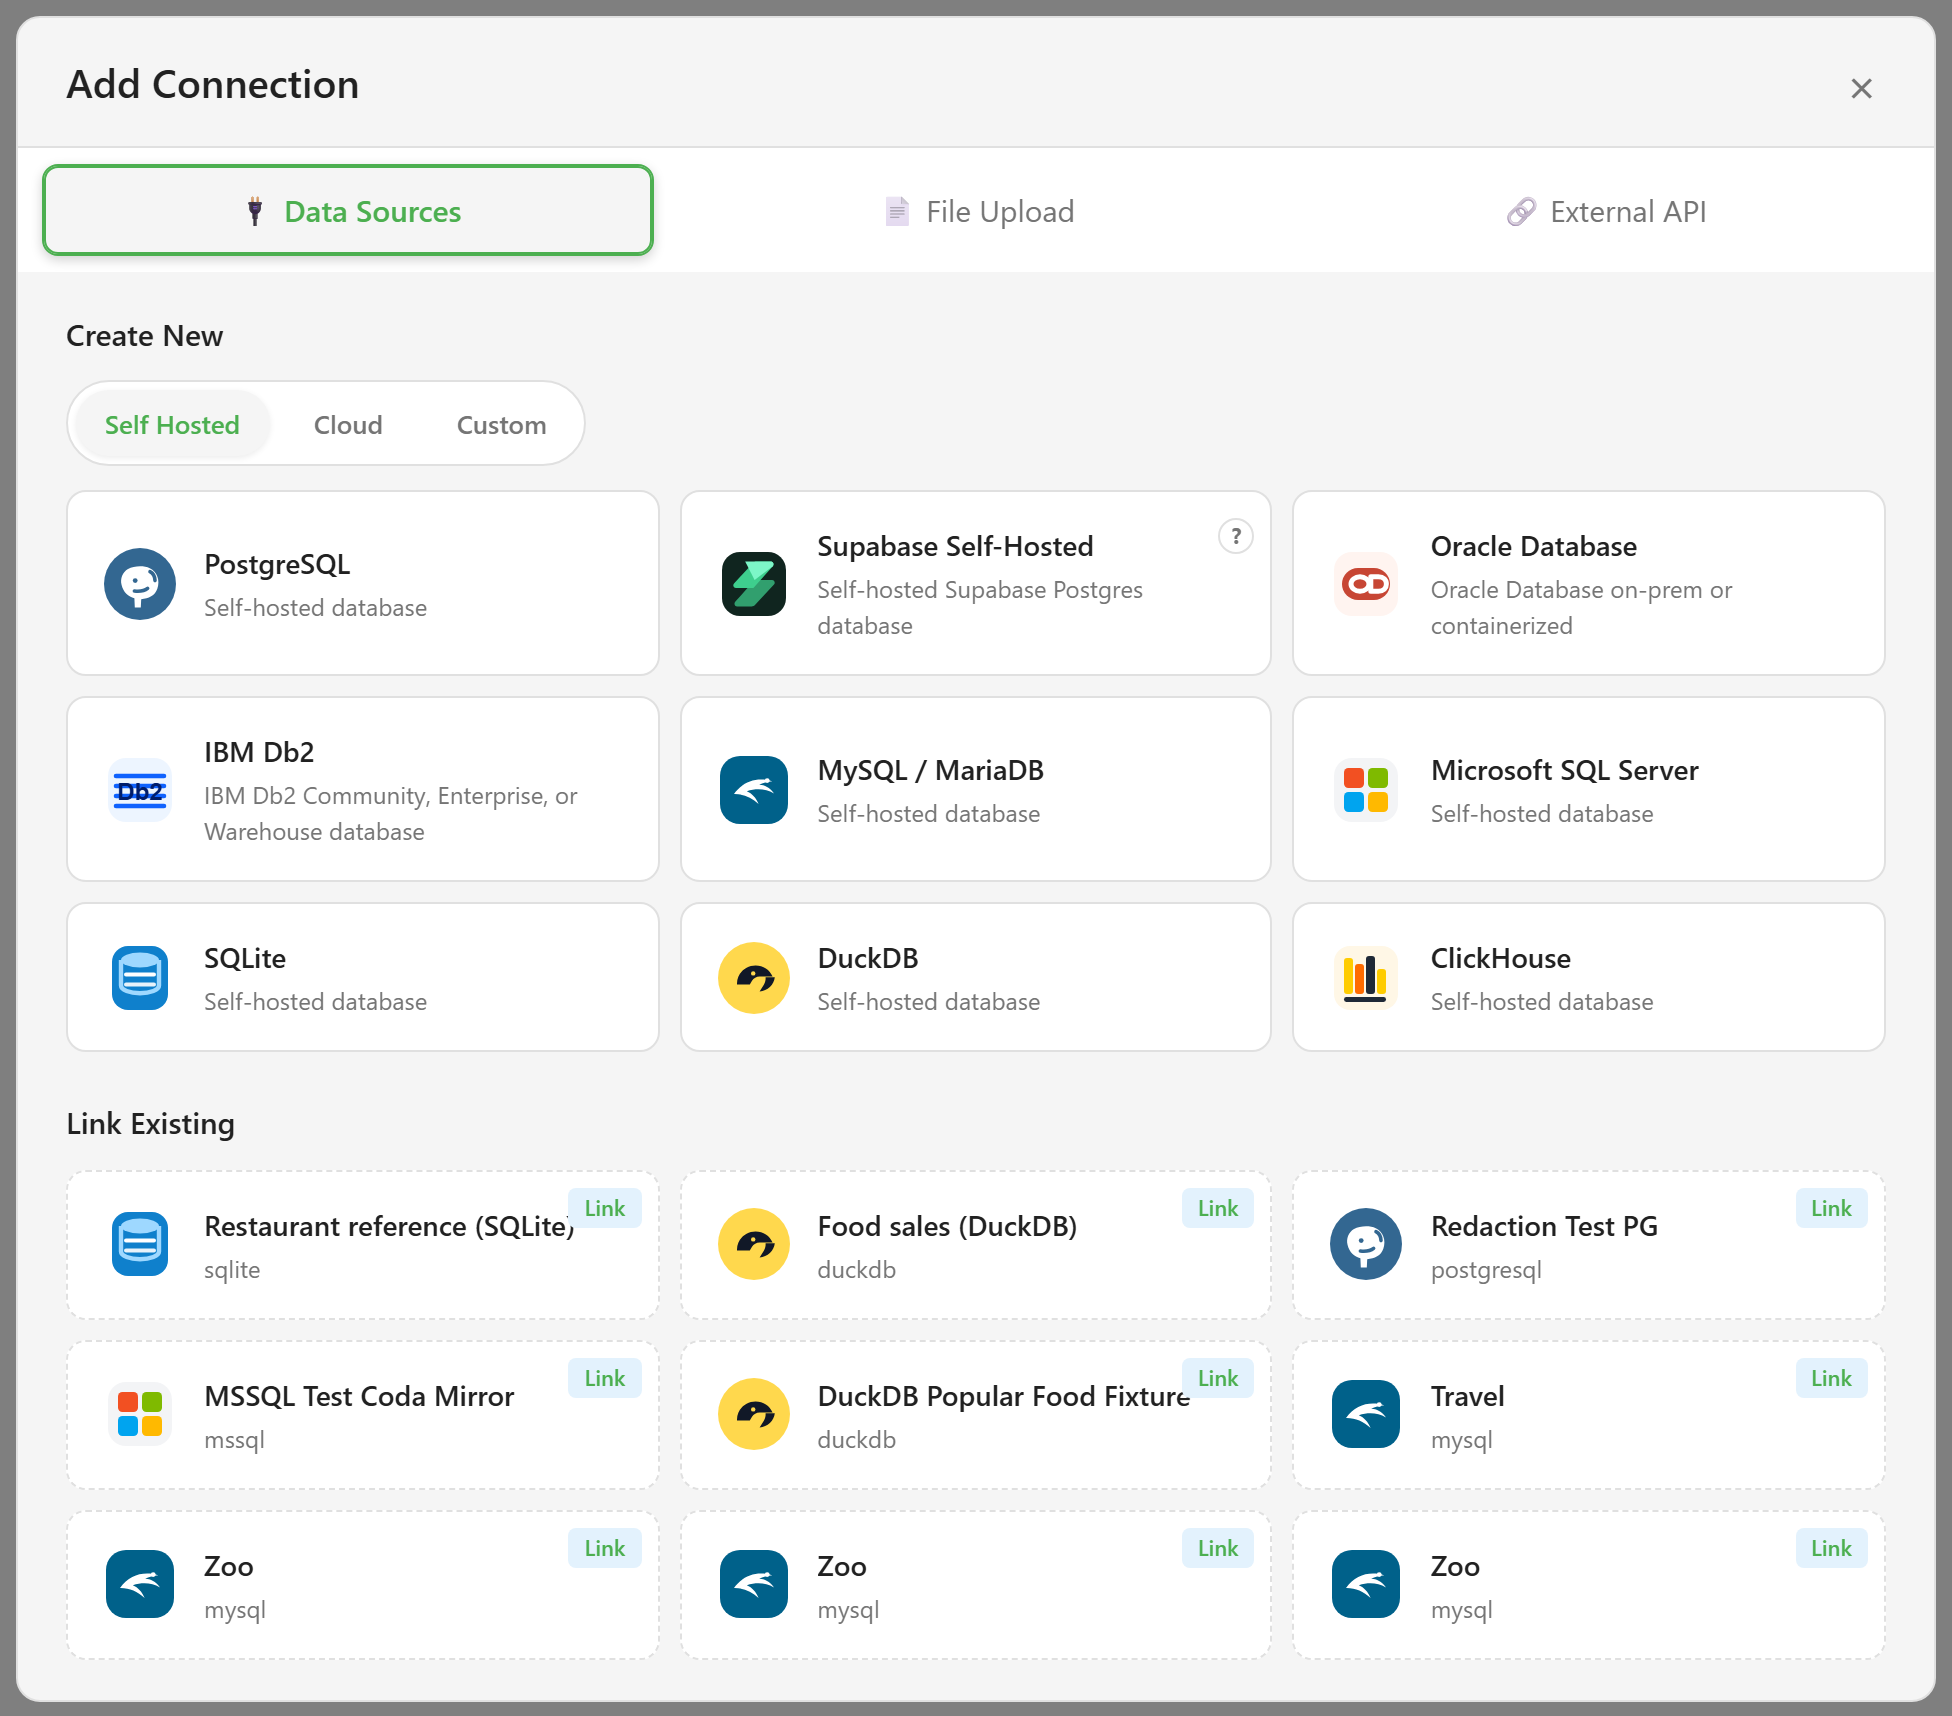
Nine self-hosted databases, eight cloud sources, and three custom connectors. Connector catalogue lists them all with the fields each one needs.
Choose the specific connector rather than a generic one that happens to work. Supabase over plain PostgreSQL, for instance — the connection is then labelled for what it is, and the connector can do provider-specific things.
Fill in the details
Section titled “Fill in the details”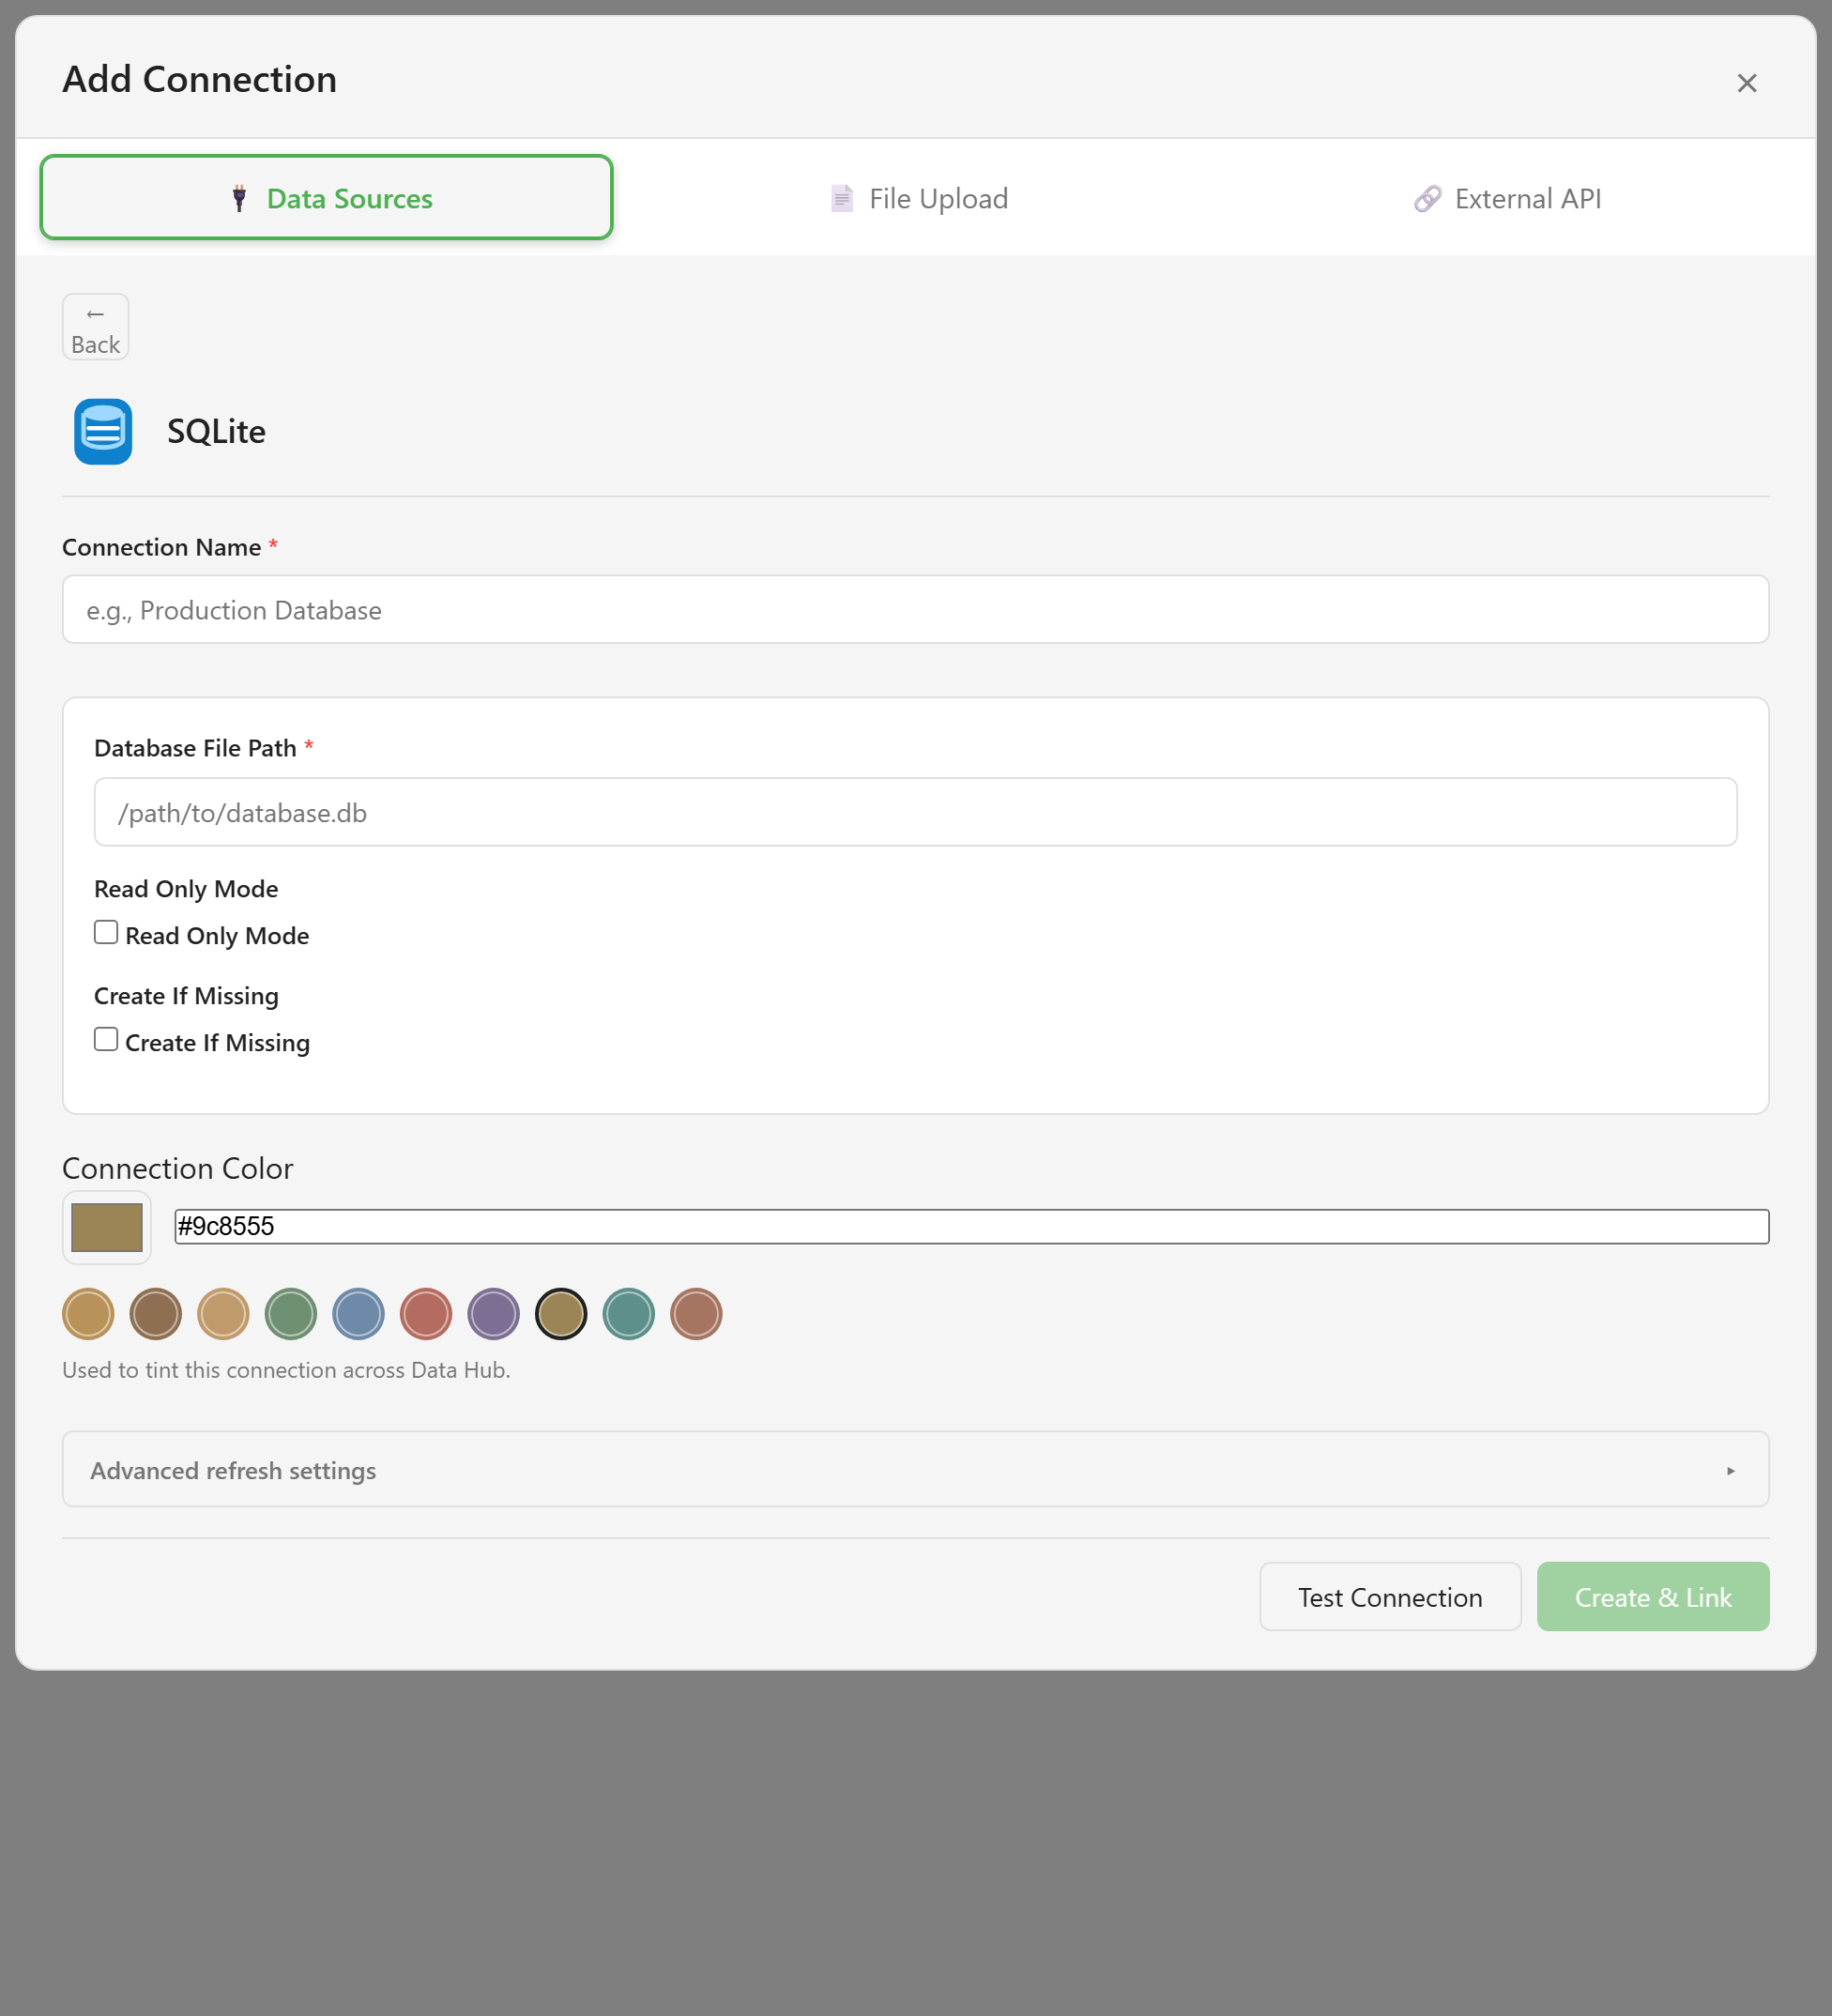
Connection Name is required and is what everyone else sees. Name it for the data and the environment: “Orders (production)” beats “Postgres 2”.
The connection fields come from the connector. Required ones are marked.
Connection Color tints this connection everywhere it appears in Data Hub. It is the cheapest safeguard available against running something against production when you meant staging, so set it — especially if the service has more than one connection to similar databases.
Advanced refresh settings sets the default caching for the connection. The default is fine to start with; Control caching covers changing it.
Test before you save
Section titled “Test before you save”Choose Test Connection. A successful test reports the server version and how many tables it found.
Read the failure message rather than guessing. “Database not found” means the path or database name is wrong, not that your credentials are.
The wizard will let you save a connection whose test failed. Nothing blocks it. So a green test result is not a formality — it is the only thing standing between you and a connection that looks fine in the sidebar and returns nothing.
Create and link
Section titled “Create and link”Create & Link creates the platform source and links it to the current service in one step.
The connection appears in the sidebar with a status dot. Green is online.
File uploads
Section titled “File uploads”The File Upload mode takes a CSV, XLSX, or XLS file up to 50 MB and turns it into a source directly. No connector, no credentials.
This is the right path for a one-off spreadsheet. It is the wrong path for anything that changes, because the file is a snapshot — when the spreadsheet is updated, the connection is not.
What happens next
Section titled “What happens next”A new connection has no tables exposed. Every table arrives hidden and the service cannot use any of them yet.
Choose which tables to expose is the step that makes the data usable, and it is the one most often missed.