
Review and approve a form submission
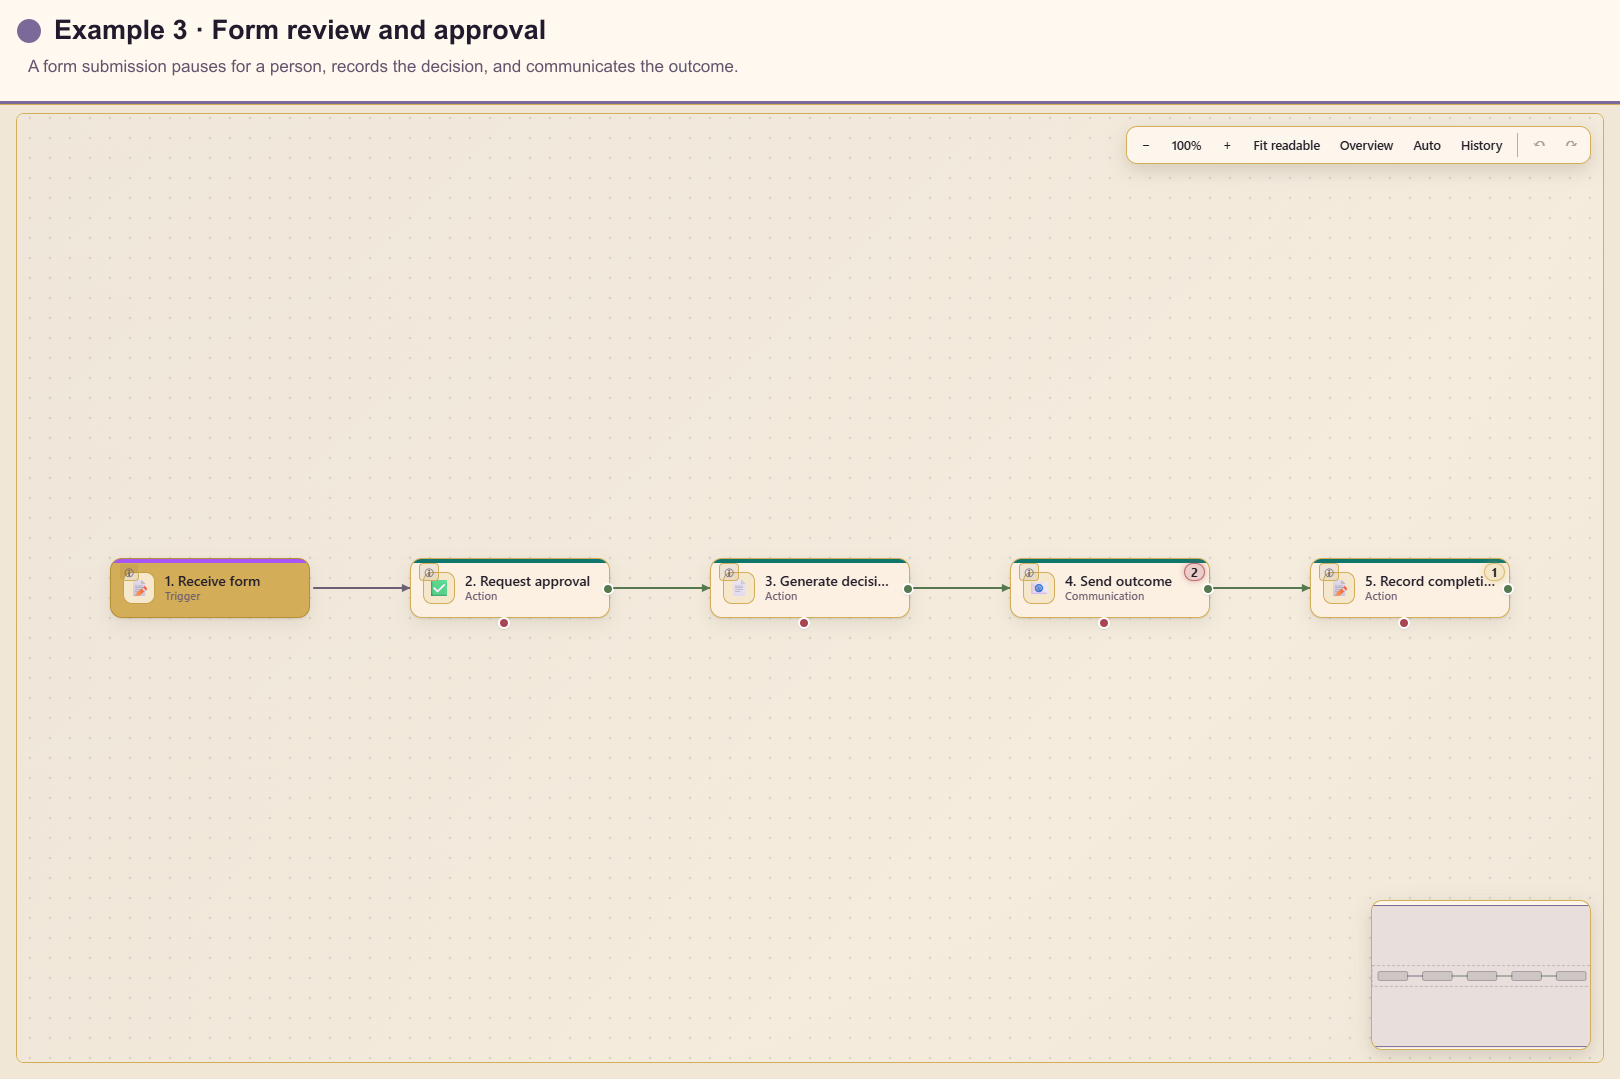
This workflow combines a form trigger, human approval, document generation, email, and an operational log. The matching draft is Docs 03 - Form Review and Approval (workflow 585) in service 20.
Outcome
Section titled “Outcome”A published form submission creates an approval task. After an approver responds, Automation generates a decision record, emails the outcome, and records completion.
Before you start
Section titled “Before you start”- Create and publish the form in service 20.
- Create a same-service document template with named input variables.
- Choose the approver or owning team and configure SLA expectations.
- Configure an email sender and test mailbox.
Build the workflow from start to finish
Section titled “Build the workflow from start to finish”Create a blank workflow in service 20. Configure and save the trigger first, then add each action from the Actions library and connect it to the previous card’s success output.
1. Add and configure the trigger
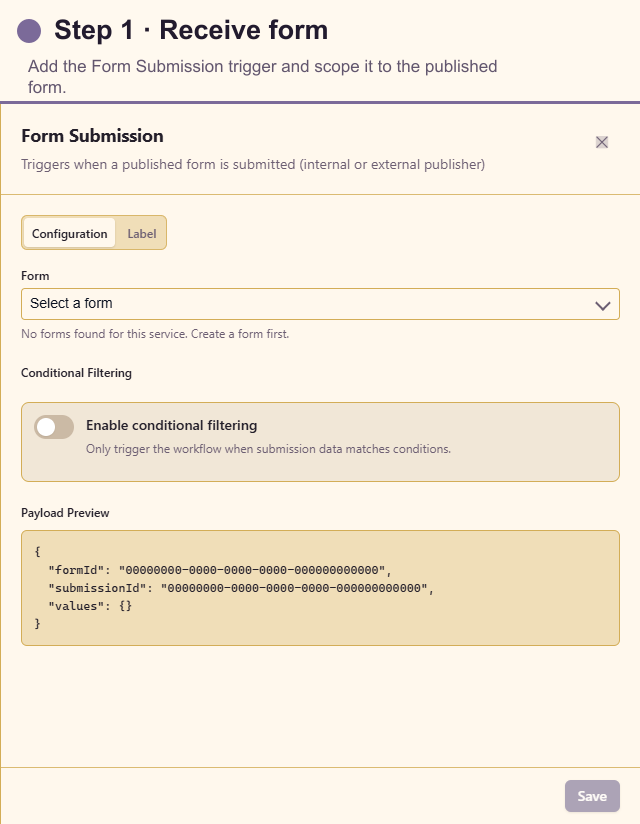
Section titled “1. Add and configure the trigger”Open Triggers and add Form Submission. Select the published form in service 20 and add field conditions only when some submissions should bypass review. Confirm the payload preview includes the respondent address and every value needed by the document template.
2. Add Request Approval
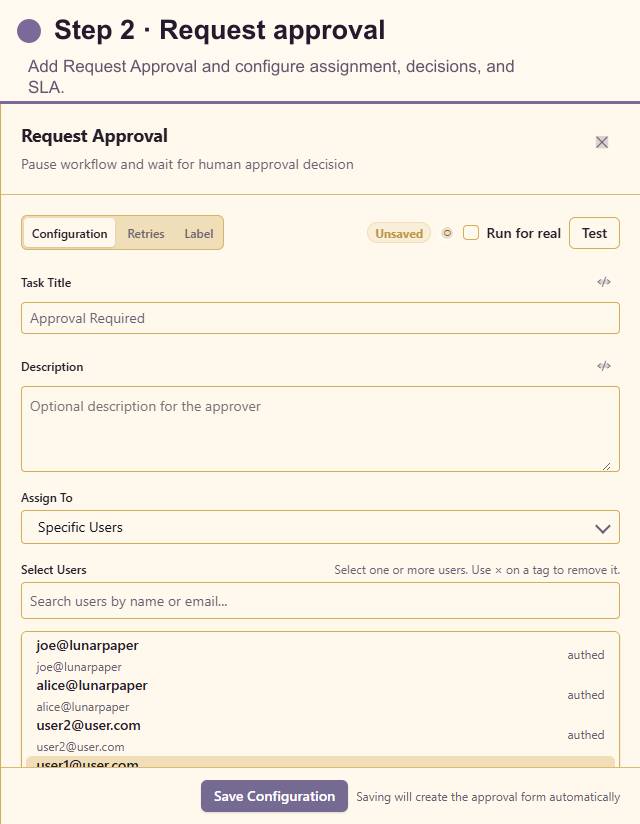
Section titled “2. Add Request Approval”Open Actions and add Request Approval. Write a task title and description that explain the decision, assign a durable team or role, use Single approval unless a threshold is required, and keep stable decision keys such as approve and reject. Configure the deadline, timeout, notifications, and escalation before saving.
3. Add Generate Document
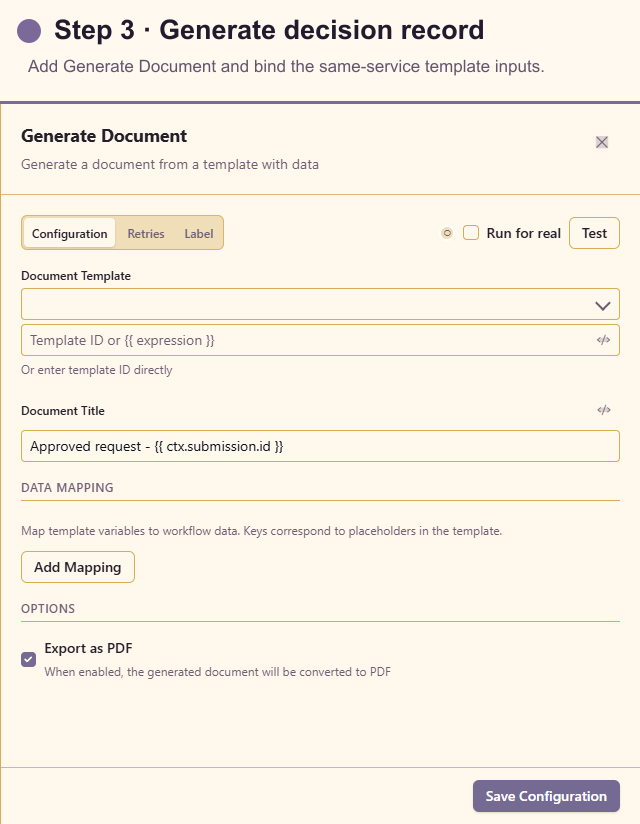
Section titled “3. Add Generate Document”Add Generate Document after the approval. Select a template from service 20, bind every required input from the submission and approval outputs, give the document a traceable title, and enable Export PDF when the customer email will attach it.
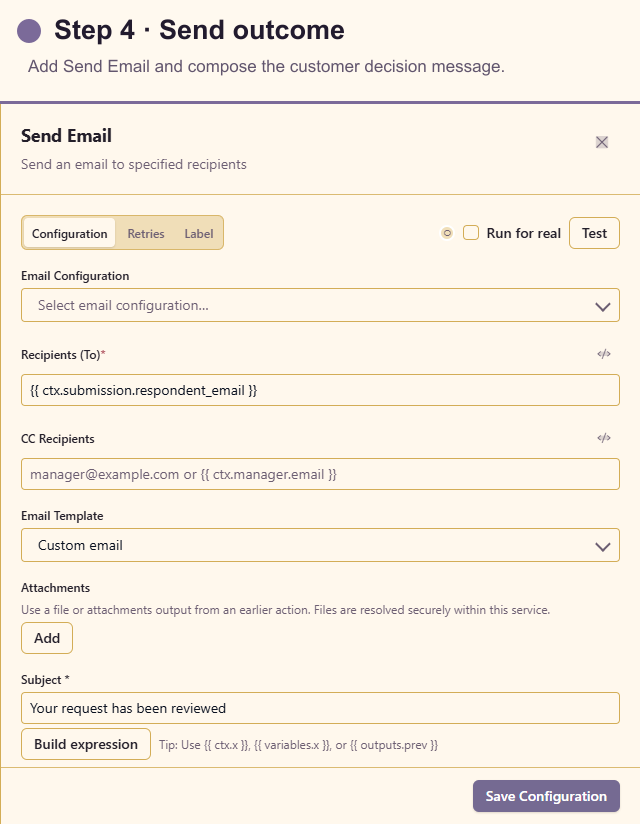
4. Add Send Email
Section titled “4. Add Send Email”Add Send Email after document generation. Insert the respondent address with the expression builder, explain the decision in accessible language, and attach the generated document output. Use a test mailbox until the entire flow has passed acceptance testing.
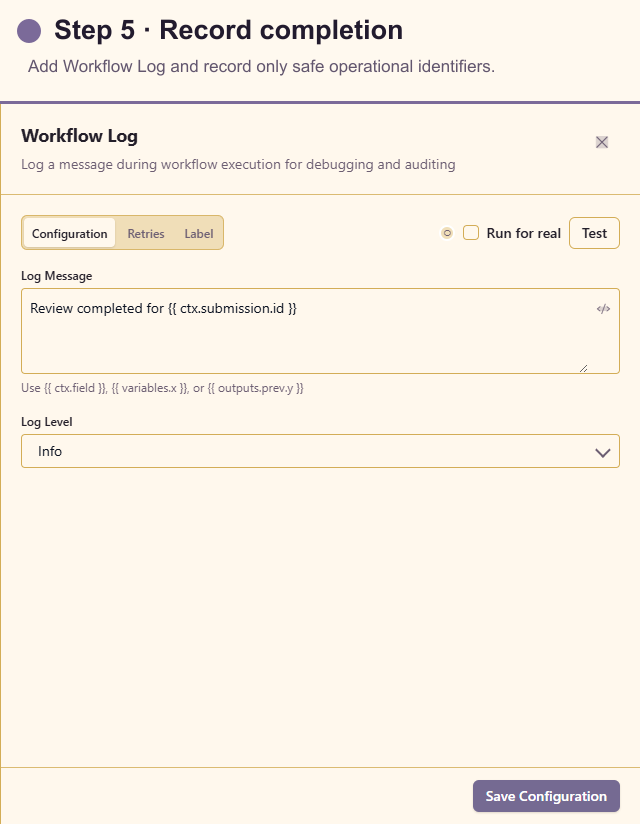
5. Add Workflow Log
Section titled “5. Add Workflow Log”Add Workflow Log last. Record the submission or case identifier and a neutral completion message; do not copy full answers or sensitive approval comments into operational logs.
The fixture shows a single success path. Before publishing, add explicit approval and rejection routes when the customer message or downstream work differs by decision.
Test the workflow
Section titled “Test the workflow”Use a synthetic form submission. Verify the approval task shows the right context and no unrelated answers. Complete both decisions in test runs, inspect generated document bindings, and send the email to a test mailbox.
Run history should show a waiting Human Task, the selected decision, document ID and attachment, email result, and final log.
Production checklist
Section titled “Production checklist”- Only the intended published form can start the workflow.
- Approver assignment and escalation survive staff absence.
- Approval and rejection use distinct, appropriate customer language.
- The document template and every required binding belong to service 20.
- Email attachments contain no internal-only sections.
- Logs contain identifiers, not sensitive answers.