
Triage a customer request
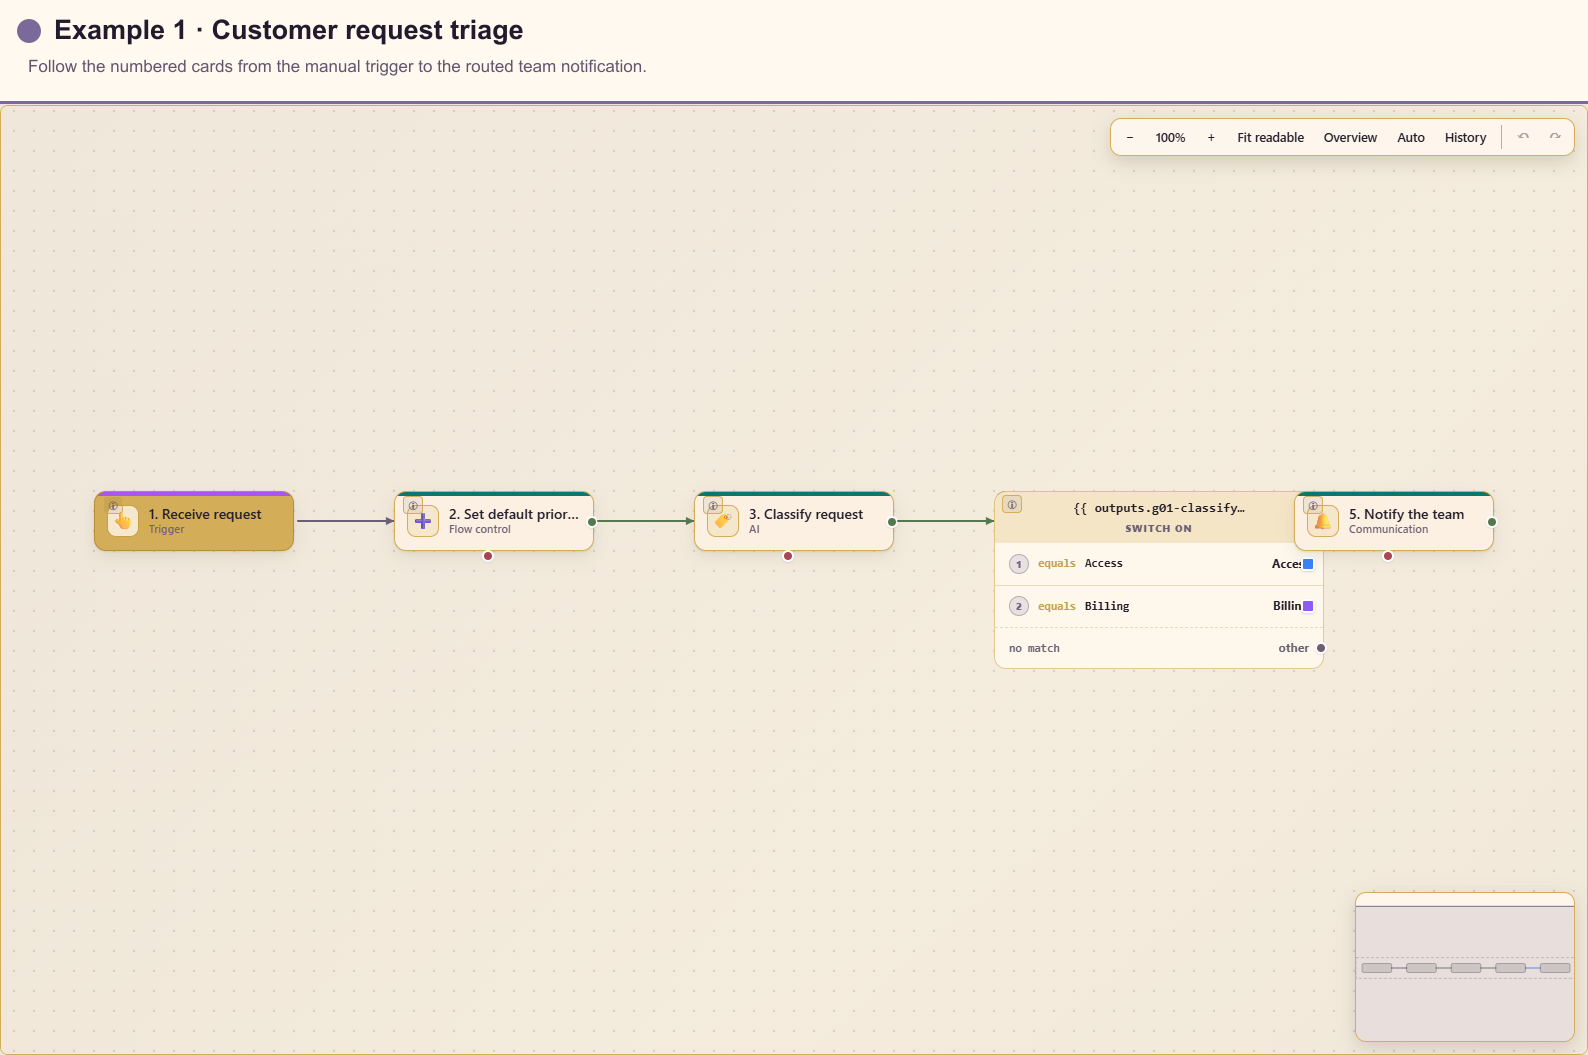
This workflow turns unstructured customer text into a consistent support category and a team notification. The matching draft is Docs 01 - Customer Request Triage (workflow 583) in service 20.
Outcome
Section titled “Outcome”An operator or parent workflow supplies request text and a reply address. Automation sets a default priority, classifies the request, routes important categories, and notifies the service team.
Before you start
Section titled “Before you start”- Configure an AI registration for Workflows.
- Decide the stable categories your service reports on.
- Choose the user, team, or expression that should receive the notification.
- Prepare synthetic examples for every category and an ambiguous example.
Build the workflow from start to finish
Section titled “Build the workflow from start to finish”Create a blank workflow in service 20. Add the following cards in order. After each configuration, select Save, return to the canvas, and connect the previous card’s success output to the new card.
1. Add and configure the trigger
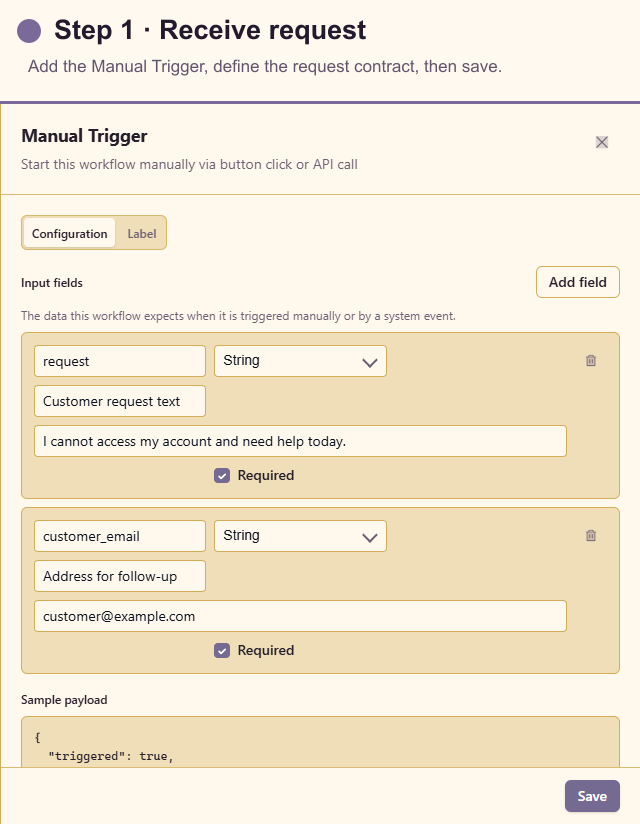
Section titled “1. Add and configure the trigger”Open Triggers, select Manual Trigger, and label it 1. Receive request. Add required string fields named request and customer_email. Give each a customer-readable description and a synthetic default so Test data starts with a useful, non-sensitive payload.
2. Add Create Variable
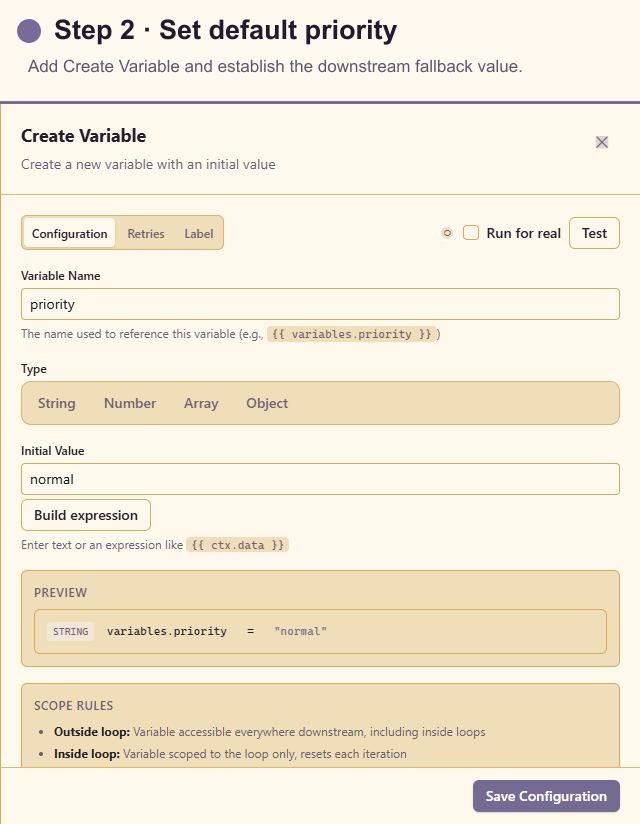
Section titled “2. Add Create Variable”Open Actions, search for Create Variable, and add it after the trigger. Name the variable priority and set its initial value to normal. This fallback keeps routing and messaging predictable when no escalation rule matches.
3. Add Classify Text
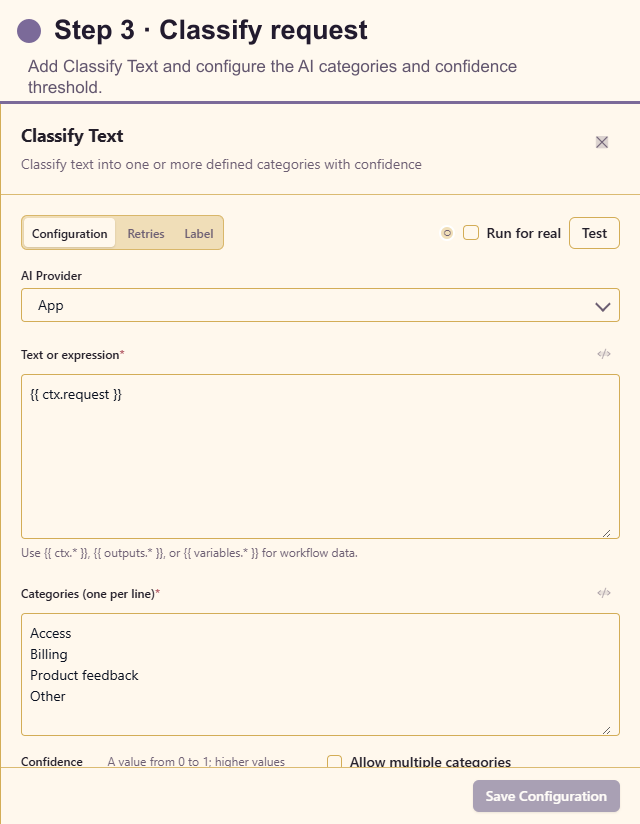
Section titled “3. Add Classify Text”Add Classify Text after Create Variable. Select the approved AI registration, set the text to {{ ctx.request }}, add one stable category per line, use a confidence threshold such as 0.7, and keep multiple categories off. In the instruction, ask for the closest customer-support category rather than a free-form answer.
4. Add Switch
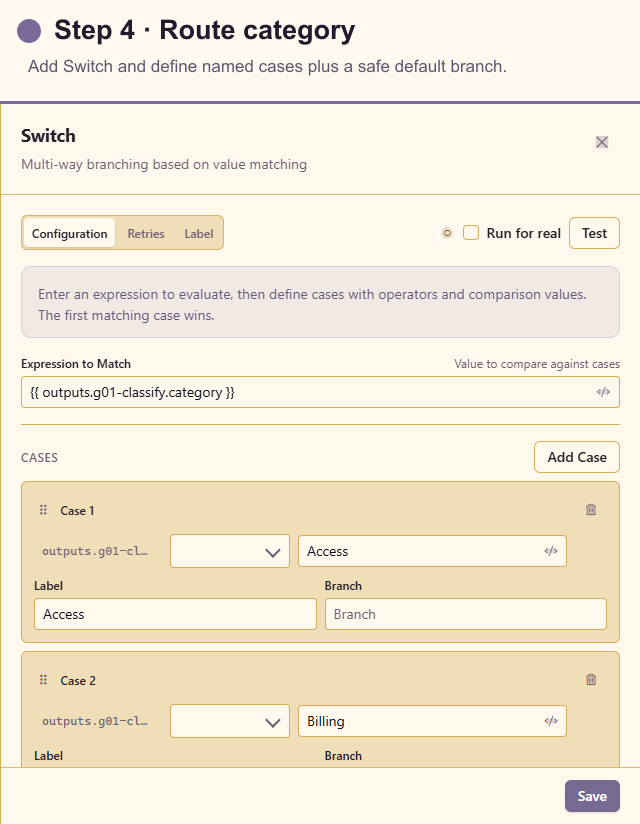
Section titled “4. Add Switch”Add Switch after Classify Text. Insert the classifier’s category with the expression builder. Create named cases for Access and Billing, then retain other as the default branch so an unfamiliar result is still visible.
5. Add Send Notification
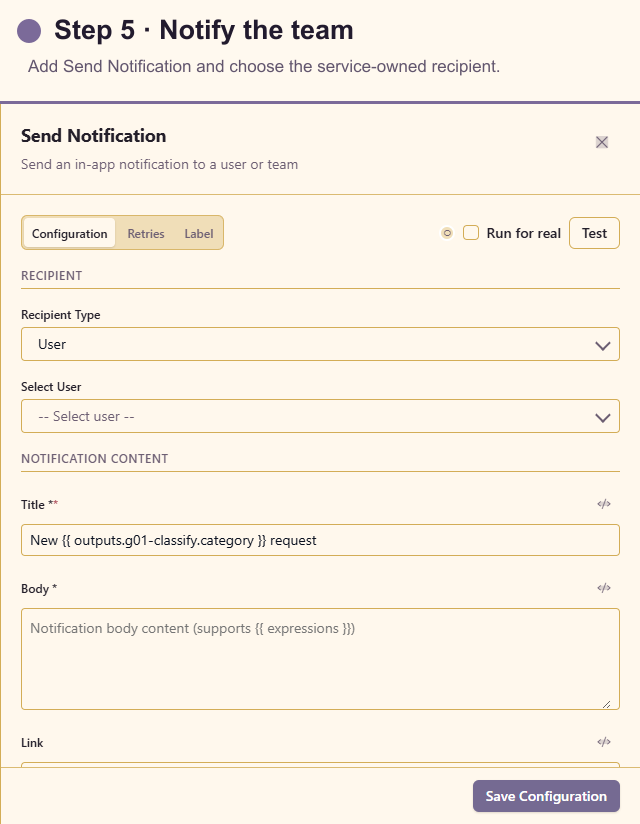
Section titled “5. Add Send Notification”Add Send Notification to each production route. Choose a service-owned user or team, use the category in the title, include only the request context the recipient needs, and add a link to the service queue when one exists.
Connect the Manual Trigger to Create Variable, Classify Text, and Switch. Connect every Switch case—including Billing and other—to an intentional next step rather than leaving a possible route as a dead end.
Test the workflow
Section titled “Test the workflow”Create Test data profiles for an access problem, a billing question, product feedback, and unclear text. Dry-run Classify Text and confirm the returned category and confidence. Run the draft and check that exactly one switch branch executes.
For the final acceptance test, choose a test recipient and deliberately use Run for real on Send Notification. Confirm the title is understandable without opening run history.
Production checklist
Section titled “Production checklist”- Categories are mutually understandable to service operators.
- A low-confidence or unknown result reaches a visible fallback.
- The recipient is a service-owned team or role, not a temporary individual.
- Customer text is not copied into a broad channel when it may contain sensitive data.
- All switch outputs that can occur are connected.
- Run history records the classifier result and selected route.