
Animate a walk cycle
A walk cycle is a loop where the last frame connects back to the first with no visible jump. The steps below turn a static character into a 6-frame walk cycle, tagged and ready to export.
You need a drawn sprite on at least a body layer. The Draw a sprite guide covers that.
Plan the six poses
Section titled “Plan the six poses”A clean walk cycle is usually six frames (four for a brisker one). The key poses, in order, are: Contact (front leg extended), Down (lowest point, weight settling), Passing (legs crossing), Contact (mirror of frame 1), Down (mirror of frame 2), Passing (mirror of frame 3). Frames 4 to 6 mirror 1 to 3 on the opposite leg.
Knowing the plan up front matters because the timing and the silhouette both depend on hitting these specific poses. You draw four distinct moments and their mirrors, not a vague notion of “walking.”
Create the frames
Section titled “Create the frames”In the timeline, click Add Frame (Ctrl+Shift+N or the ➕ at the end of the frame strip) until you have six frames. Switch to Grid Timeline so you can see layer rows against frame columns; this view is what makes a multi-frame edit manageable.
Turn on onion skinning
Section titled “Turn on onion skinning”Open Settings from the top toolbar, find Onion Skinning, and enable it with previous frames and next frames both set to 1. Set the opacity so the ghosts are visible but not distracting. You’ll now see faded outlines of neighbouring frames as you edit each one, which is how you keep proportions consistent across the cycle.
Edit each pose
Section titled “Edit each pose”Work on the body layer (and outfit or equipment if you have them). Select a frame in the timeline, then adjust the leg and arm positions to match the planned pose, using the previous frame’s onion ghost to stay on model.
To move whole limb clusters rather than redraw them, select them with the Lasso (Q) or Rectangle Selection (M), then use Move (V). Mirroring is faster than redrawing for frames 4 to 6: select the limb cluster from the mirrored frame, copy, paste onto the target frame, and use Flip H (Shift+H).
Two things make a walk look correct at 32×32. First, the body rises on passing frames and dips on contact frames, and about 1 px of vertical bob is plenty. Second, the head should barely move: the legs do the work, and a bouncing head looks like a hop.
Set the frame durations
Section titled “Set the frame durations”Click the duration button under each frame (the default is 100 ms) and try 80 ms per frame for a brisk walk. The status bar shows the total duration (around 480 ms) and the approximate FPS, so you can confirm the result without calculating.
Tag the range
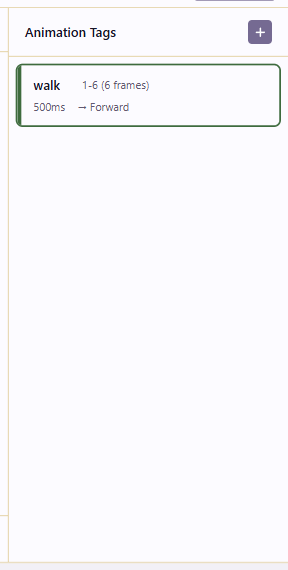
Section titled “Tag the range”Open Animation Tags, add a tag named walk, and set its range to frames 1–6 with direction Forward. The tag lets you export this animation separately from a project that may eventually hold several.
Preview and refine
Section titled “Preview and refine”Press Space to play with Loop on. The cycle should play seamlessly. If there’s a jump between frame 6 and frame 1, the first and last poses aren’t mirroring correctly and you’ll need to adjust one. Onion skinning helps you see where the discontinuity is.
A 6-frame cycle rarely needs tweening, but if it looks choppy you can insert tween frames between key poses using the Tween button on the body layer with Hybrid easing. The trade-offs of when tweening helps are in Generate in-between frames.
Save and prepare to export
Section titled “Save and prepare to export”Press Ctrl+S. The walk tag is now available in the Export dialog, so you can export this animation as a sprite sheet or a PNG sequence. See Export an engine-ready sprite sheet for the layout.