
Quickstart — publish your first form
Create a useful multi-page form in about fifteen minutes. At the end, you will have a validated draft, a published internal copy, a completion page, and a response you can review.
1. Open Forms in a service
Section titled “1. Open Forms in a service”Open the service that owns the intake process and select Forms under Process Modules. Choose Create Form for a blank draft, From Schema for JSON, or Create with AI for a proposed first draft.
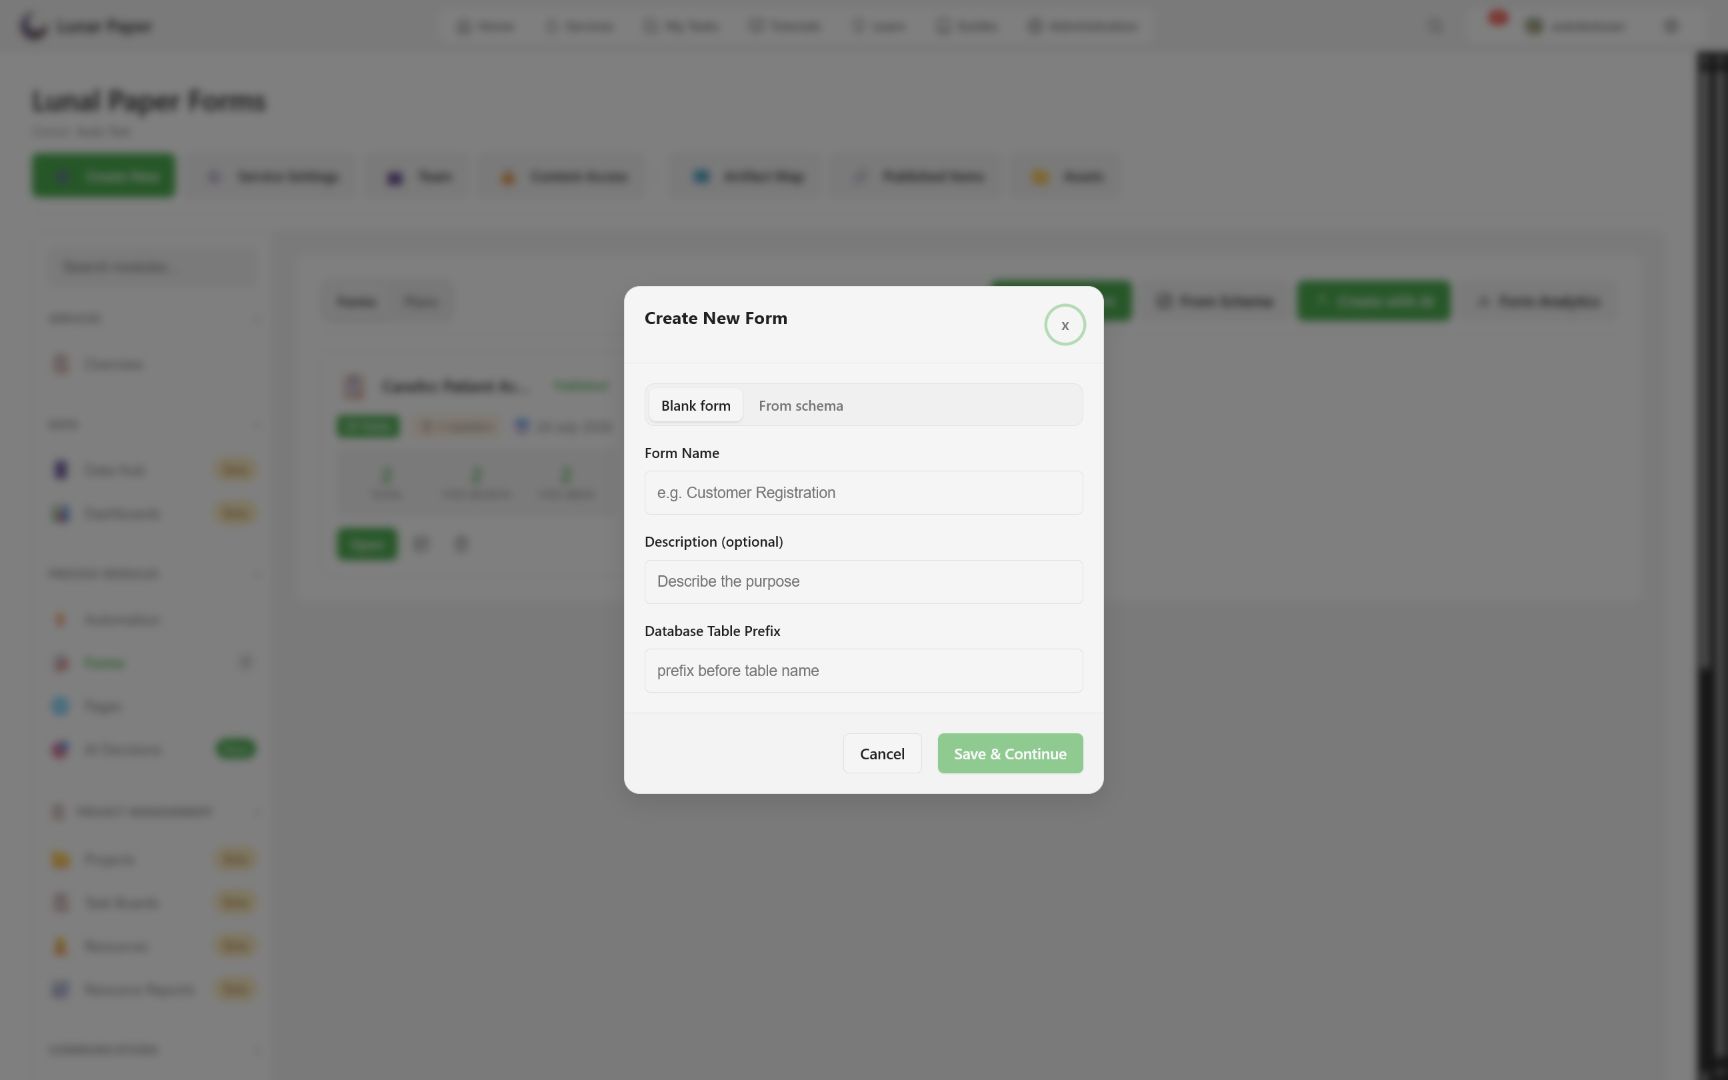
Use a specific name, purpose, and table prefix. For example:
- Name:
CareArc Patient Access & Support Request - Description:
Service-ready intake for appointment access and support - Table prefix:
carearc_access_docs
2. Add pages
Section titled “2. Add pages”Add one page for each respondent decision, not every individual field. A practical structure is:
- Contact details
- Request details
- Documents and consent
- A submission-complete page
Double-click a page tab or focus it and press F2 to rename it. Press Enter or move focus away to save the name; press Escape to cancel.
Set the last page’s Page purpose to the submission-complete page. It carries a Complete badge in the page strip, and it is excluded from respondent steps and from stored answers.
3. Add fields and layouts
Section titled “3. Add fields and layouts”Use the Fields palette for respondent inputs and display content. Use Layout for sections, repeaters, tabs, and visual containers. Select an item on the canvas to edit its label, description, width, validation, database name, or style.
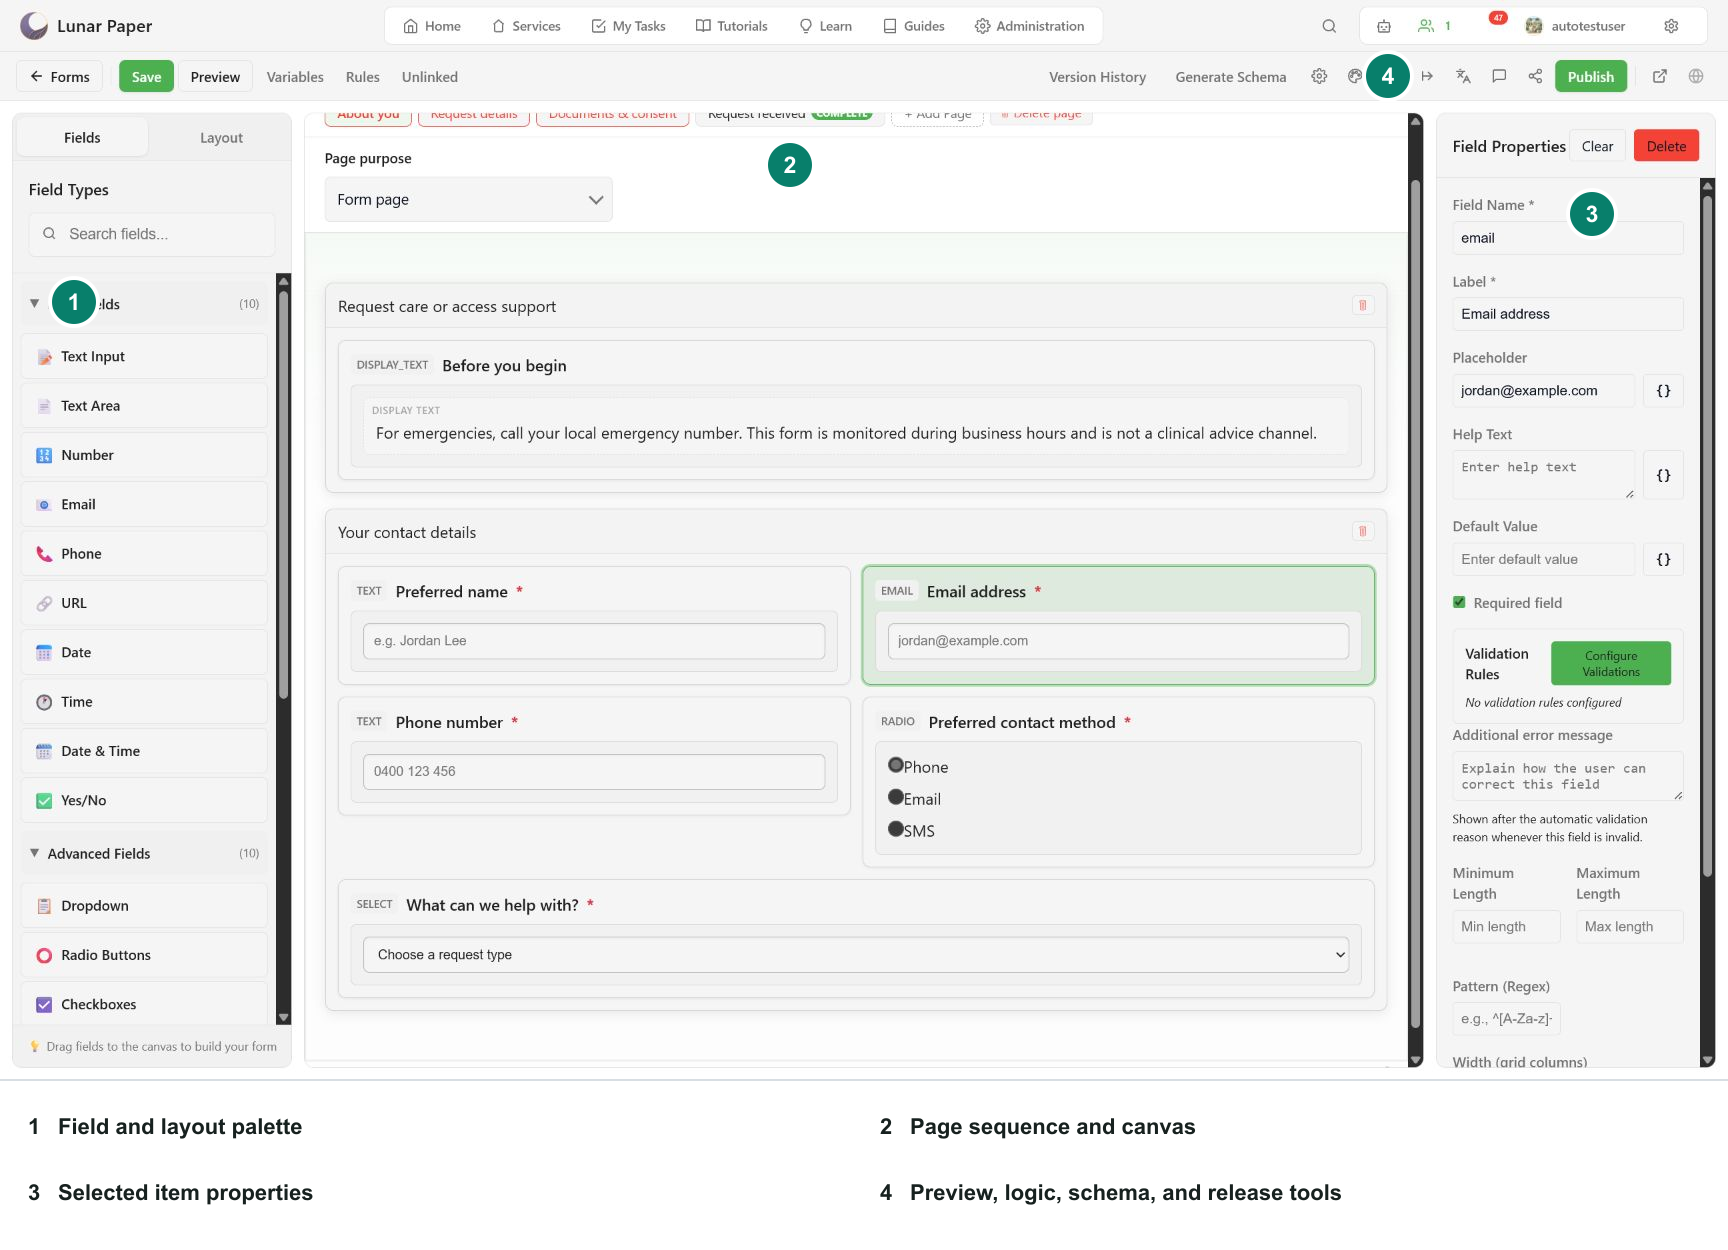
Keep field labels conversational and keep database field names stable. Put repeating records such as attendees or line items in a Repeater so each row is stored in a child table.
4. Add validation
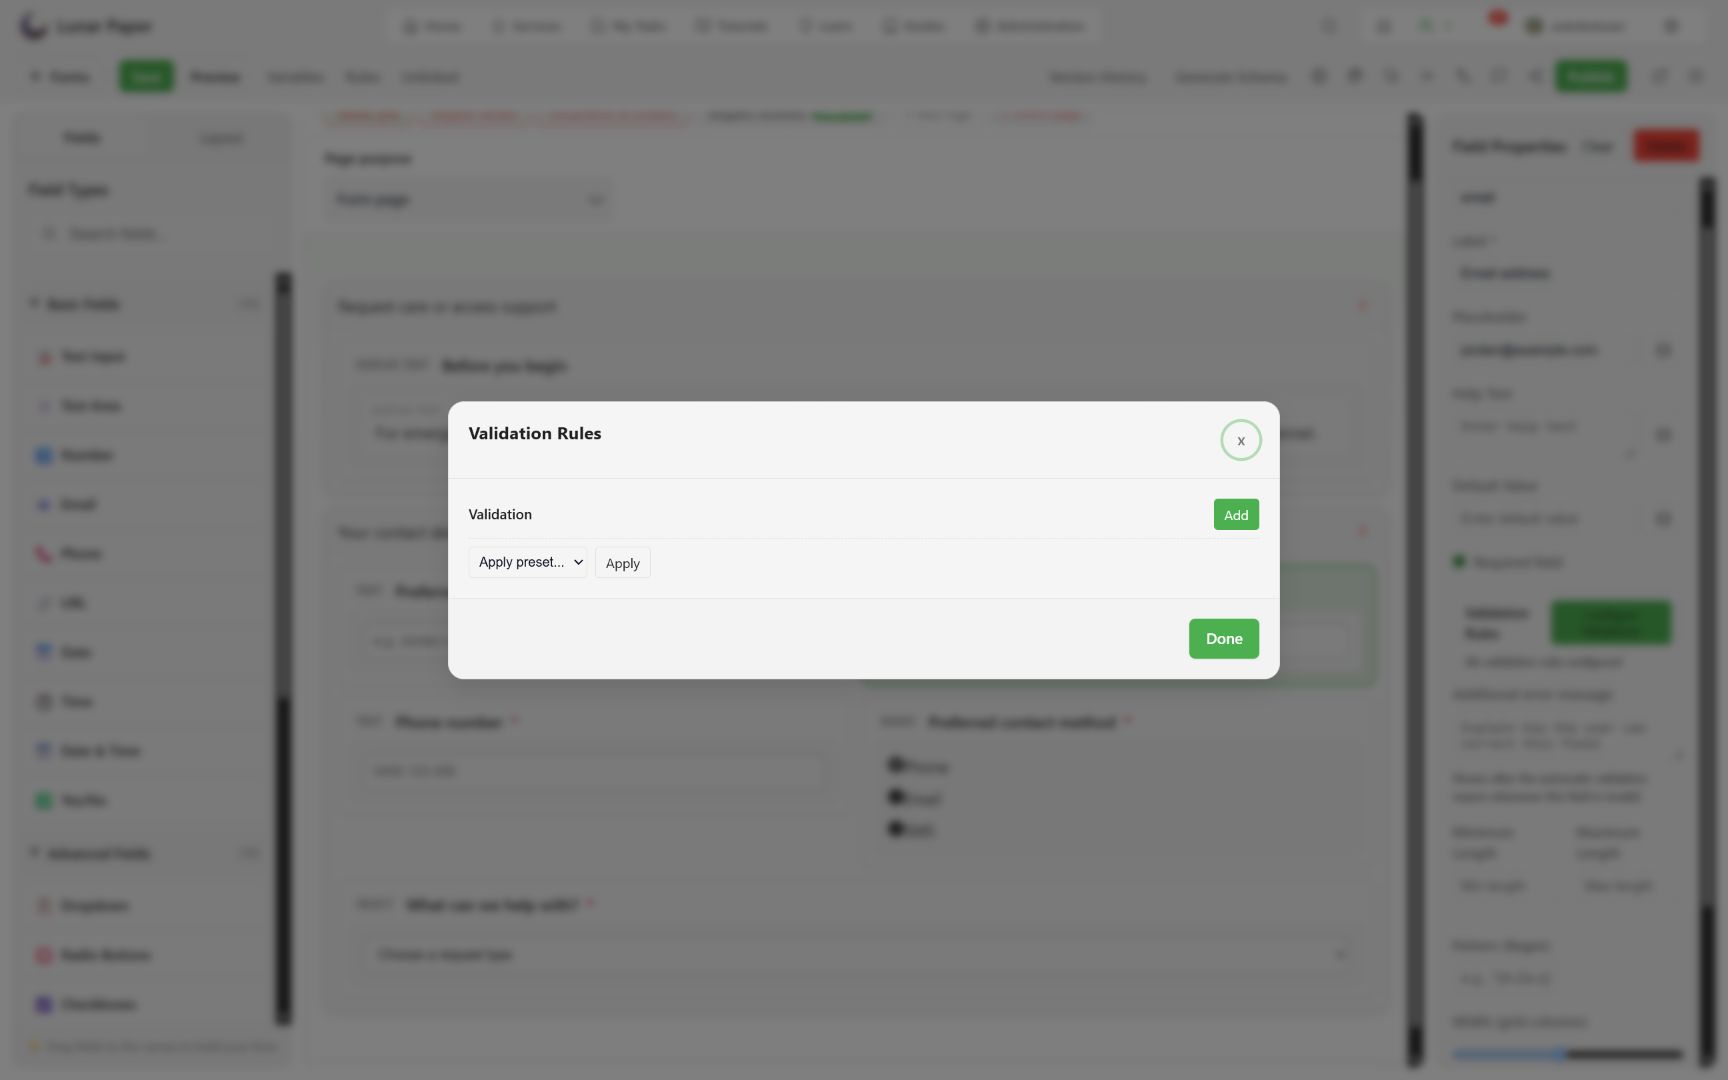
Section titled “4. Add validation”Mark genuinely required fields as Required field. Use Configure Validations for reusable rules, then add length, pattern, or corrective guidance only when it helps a respondent recover.
5. Preview and correct errors
Section titled “5. Preview and correct errors”Choose Preview, then test desktop, tablet, and phone. Select Next with required answers missing and confirm that every error identifies the problem next to the relevant field.
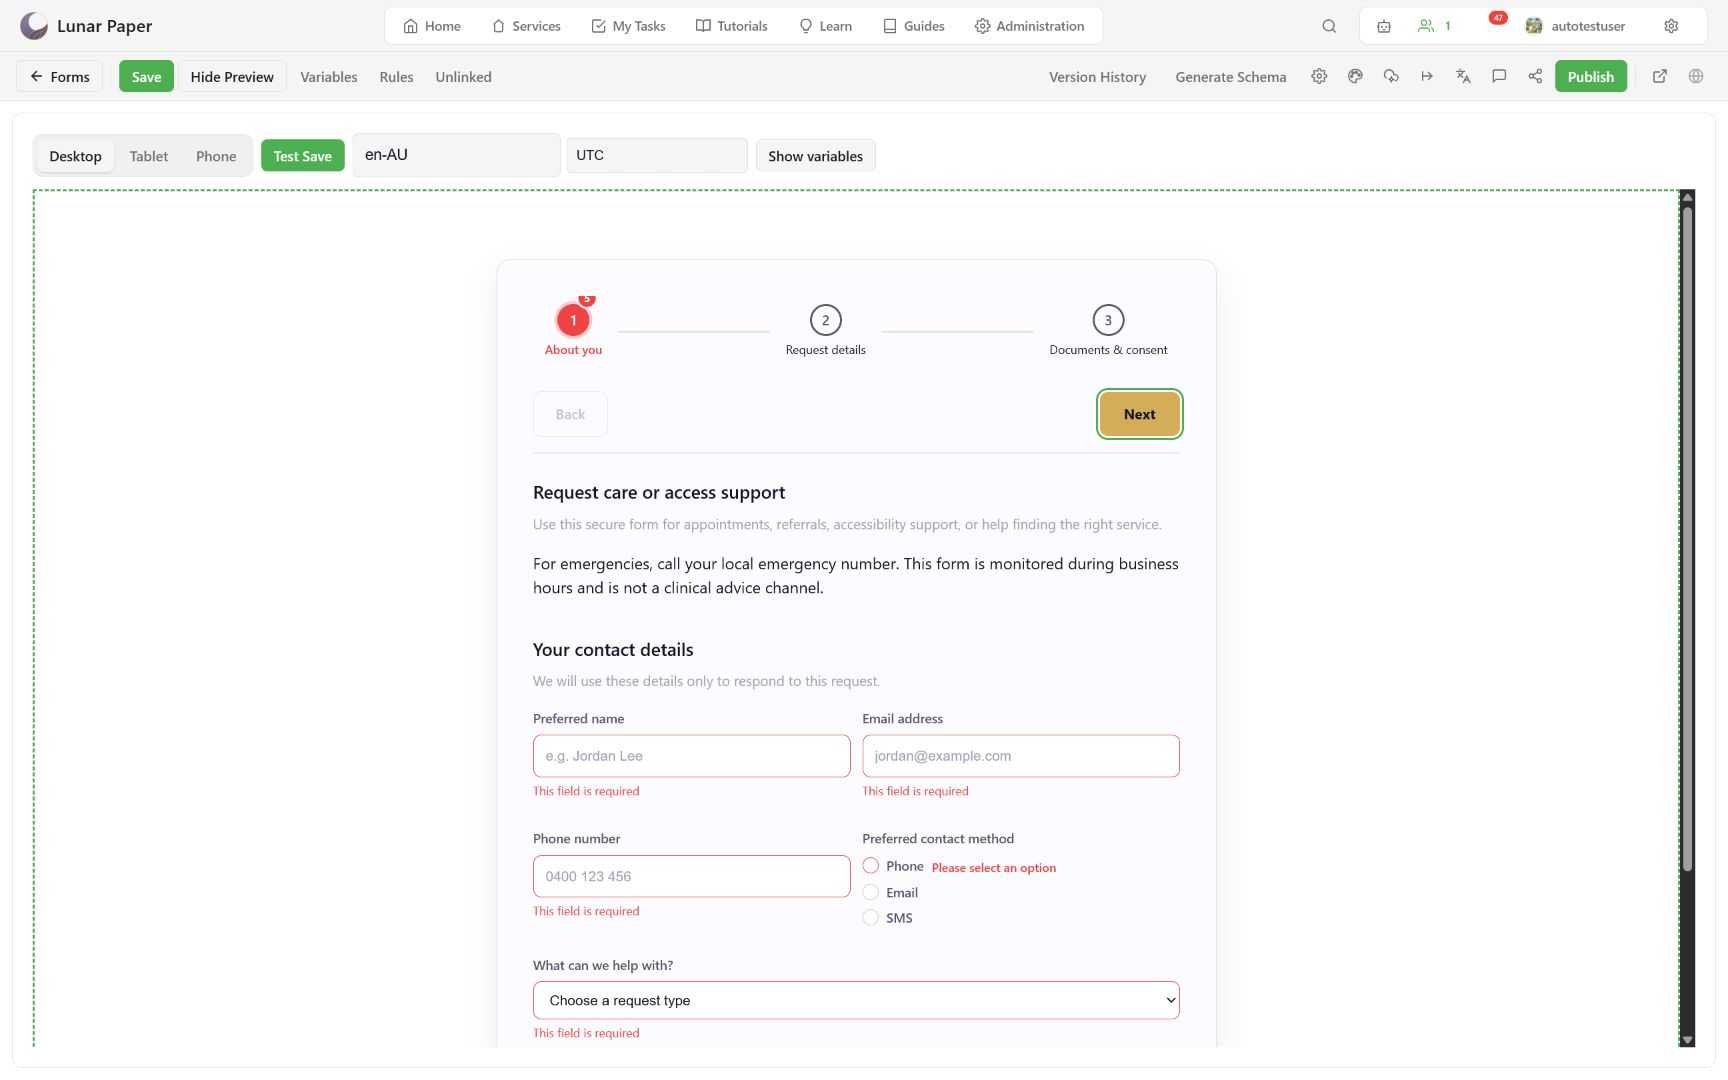
Use the locale and time-zone controls when the form contains date, time, or date-range fields. Preview changes are test settings; they do not rewrite the saved respondent data.
6. Configure completion and publish
Section titled “6. Configure completion and publish”Open Submission actions. A common sequence is:
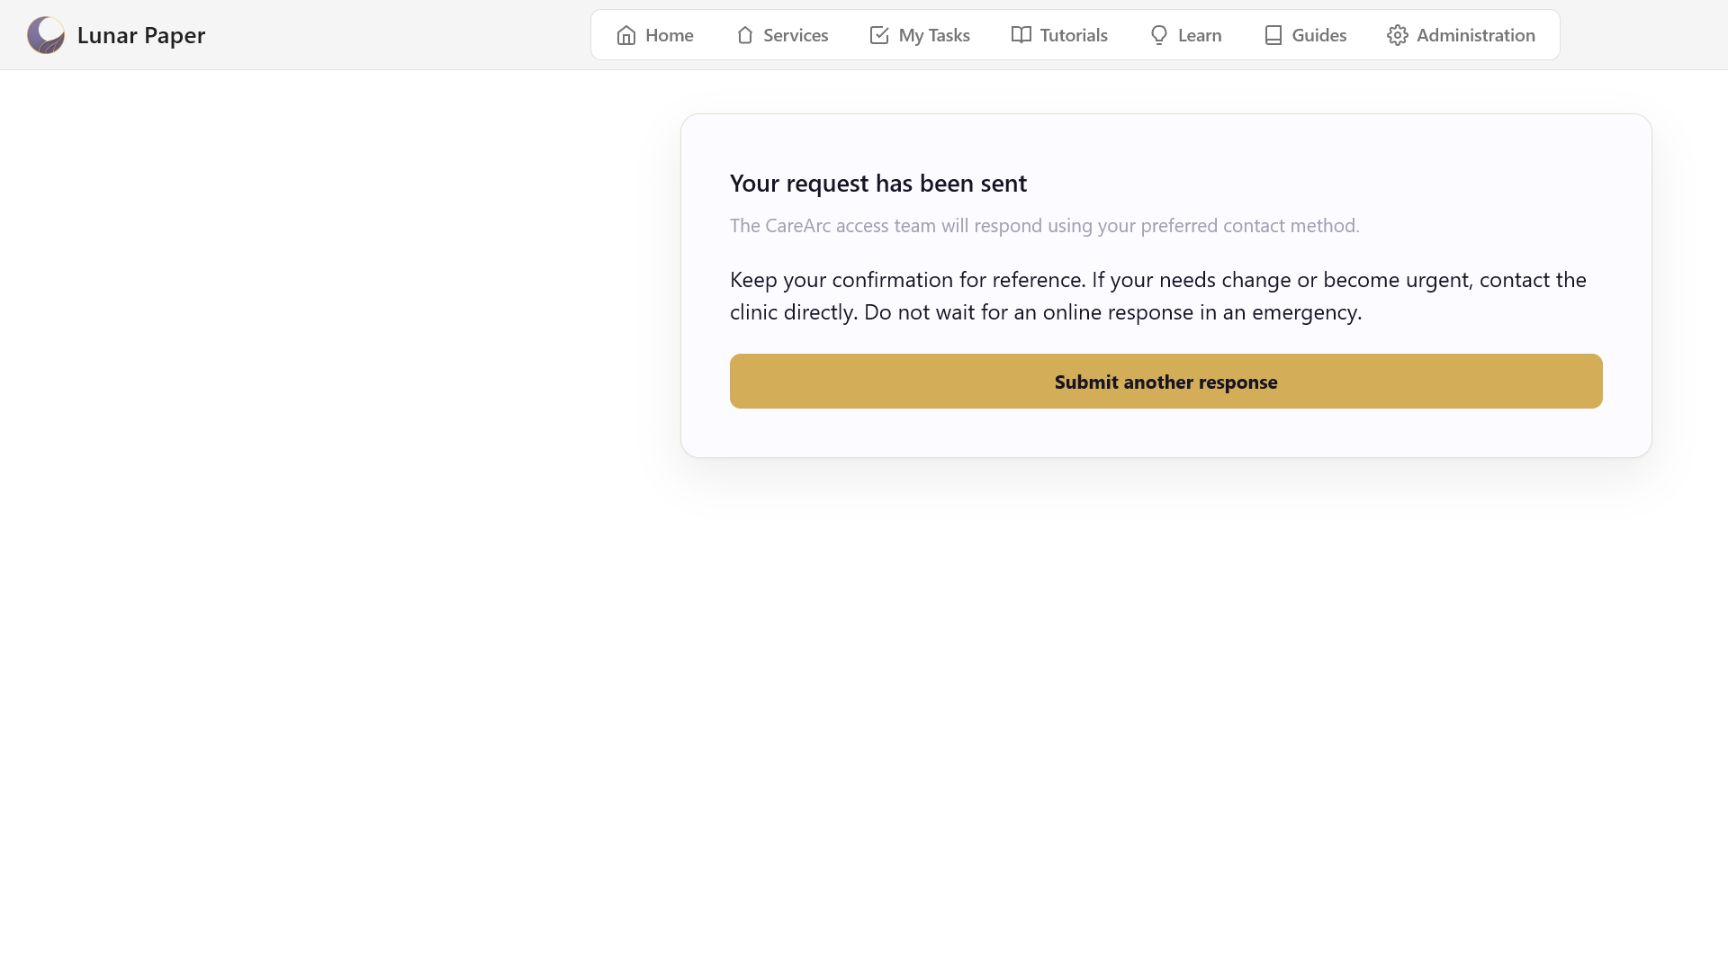
- Show completion page
- Show submit-another-response button
Open Internal & external publishing. Enable the Internal Publisher for authenticated use, choose an external publisher only when anonymous delivery is intended, and review Internal access before release.
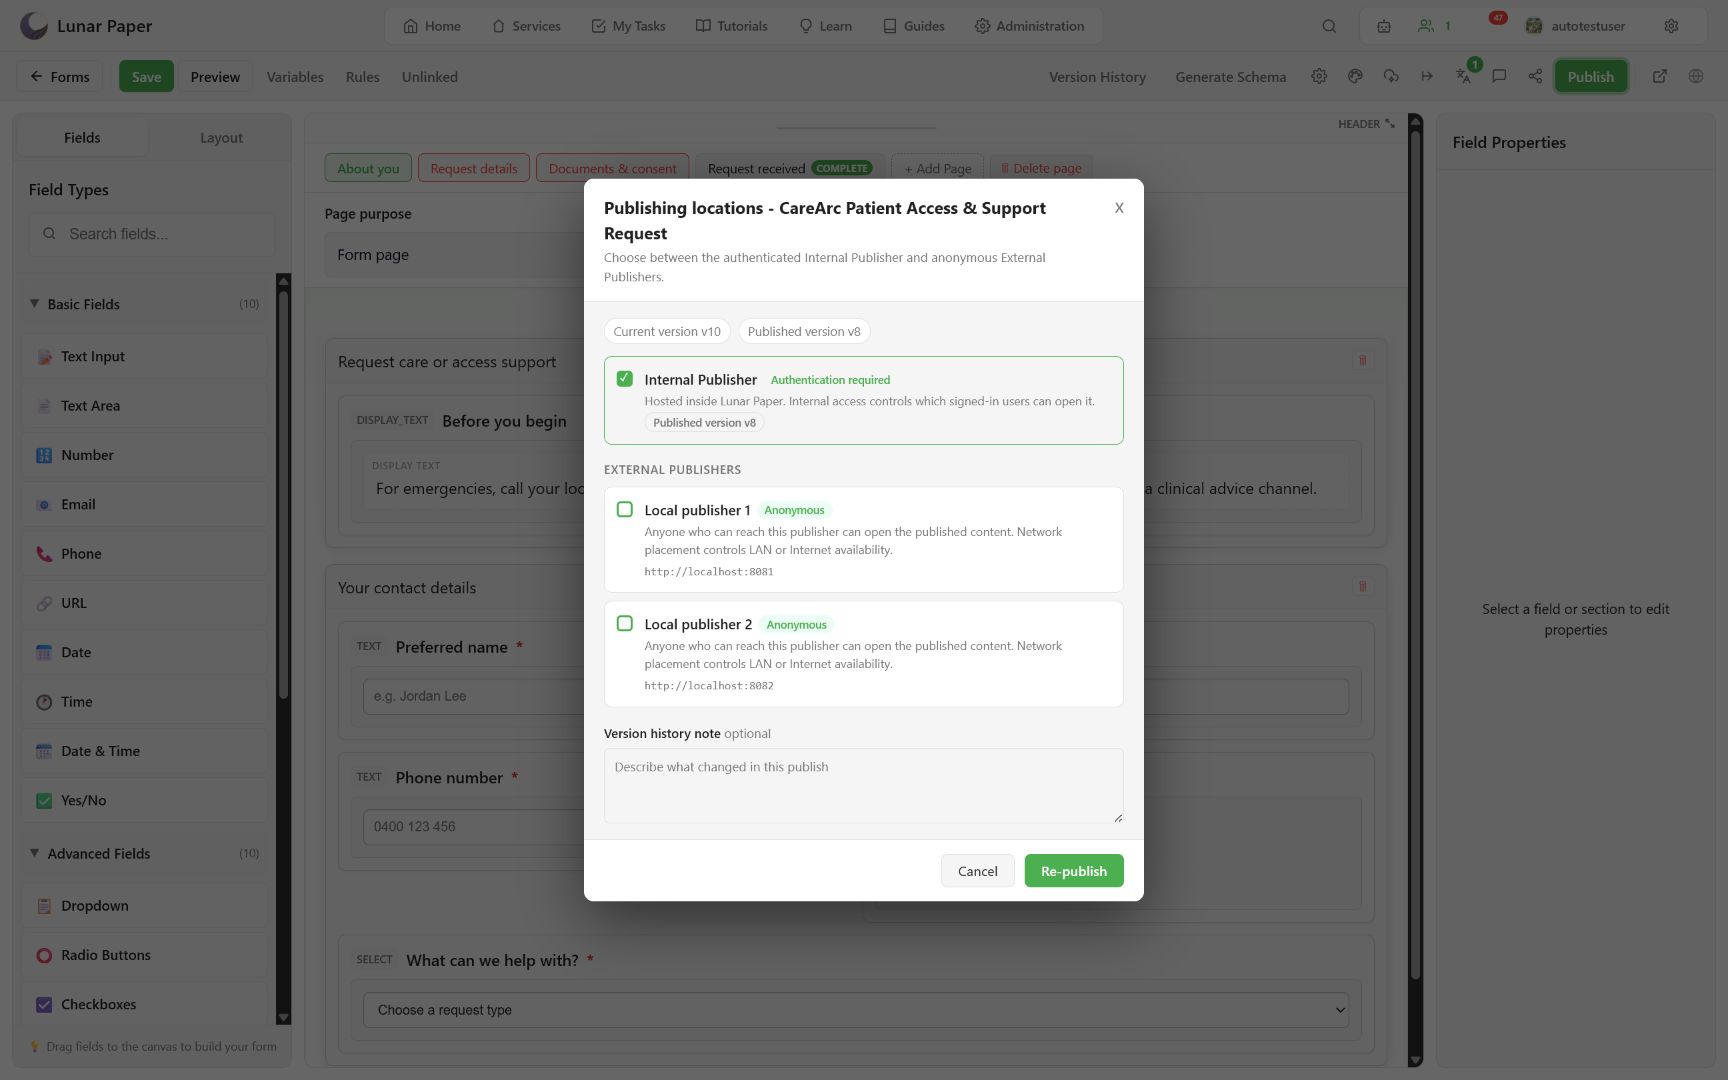
Choose Publish, add a concise version note, and confirm. The toolbar replaces Not published yet with View Published Form.
7. Submit and review
Section titled “7. Submit and review”Open the published form, complete each page, and submit. Confirm that the completion page appears only after storage succeeds.
Return to the form catalogue. The card should show the updated response count. Choose View Data to inspect the response, any repeater child rows, and the Export CSV action.
Next, read Build fields and validation or Publish, submit, and recover.