
Work with tracks
Tracks hold the layers of your project. A typical project has separate tracks for drums, bass, melody, vocals, and effects.
Add a track
Section titled “Add a track”Click the + button next to Tracks in the left panel. A new track appears with a default name such as Track 2. Double-click the track name and type something descriptive, such as Kick, Bass, or Lead Synth.
Track controls
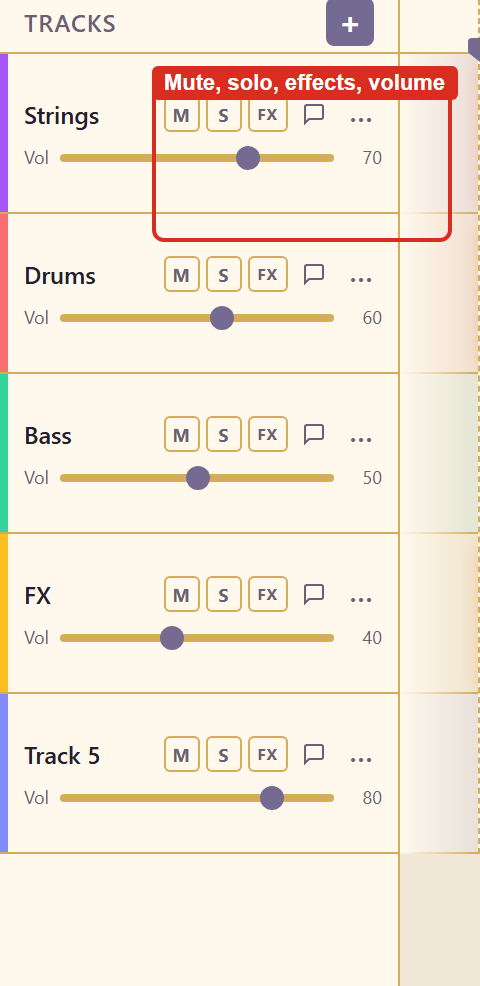
Section titled “Track controls”Each track has a compact control strip:
- Mute (
M). Silences the track during playback. - Solo (
S). Plays only that track, muting all others. - FX. Opens the effects chain for that track.
- Volume slider. Sets the track level from 0 to 100%.
- Comments. Opens a comment thread for the track.
- More menu (
...). Additional track options such as rename, color, or delete.
Effects
Section titled “Effects”Click FX on a track to open the effects panel.
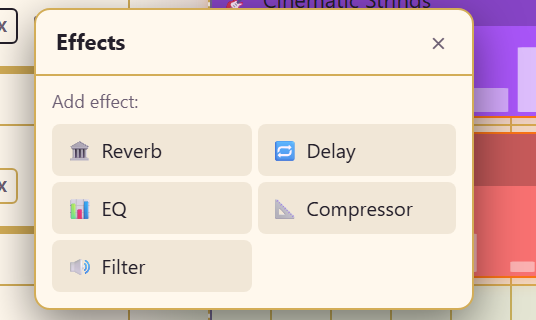
Five inserts are available: Reverb, Delay, EQ, Compressor, and Filter. The signal flows from the track through each effect in order, then to the master mix.
Volume and balance
Section titled “Volume and balance”Drag the volume slider to set a rough balance. Fine-tune levels in the Mixer panel, where you can see all track levels at once.
Delete a track
Section titled “Delete a track”Open the track’s More menu and choose Delete track. Confirm if prompted.
When there are several tracks
Section titled “When there are several tracks”Once you have a few tracks, Use the Mixer shows all their levels side by side. Use spatial audio places each one left, right, or further back, and Browse and apply presets is the quickest way to give a track a sound.