
Work on the canvas
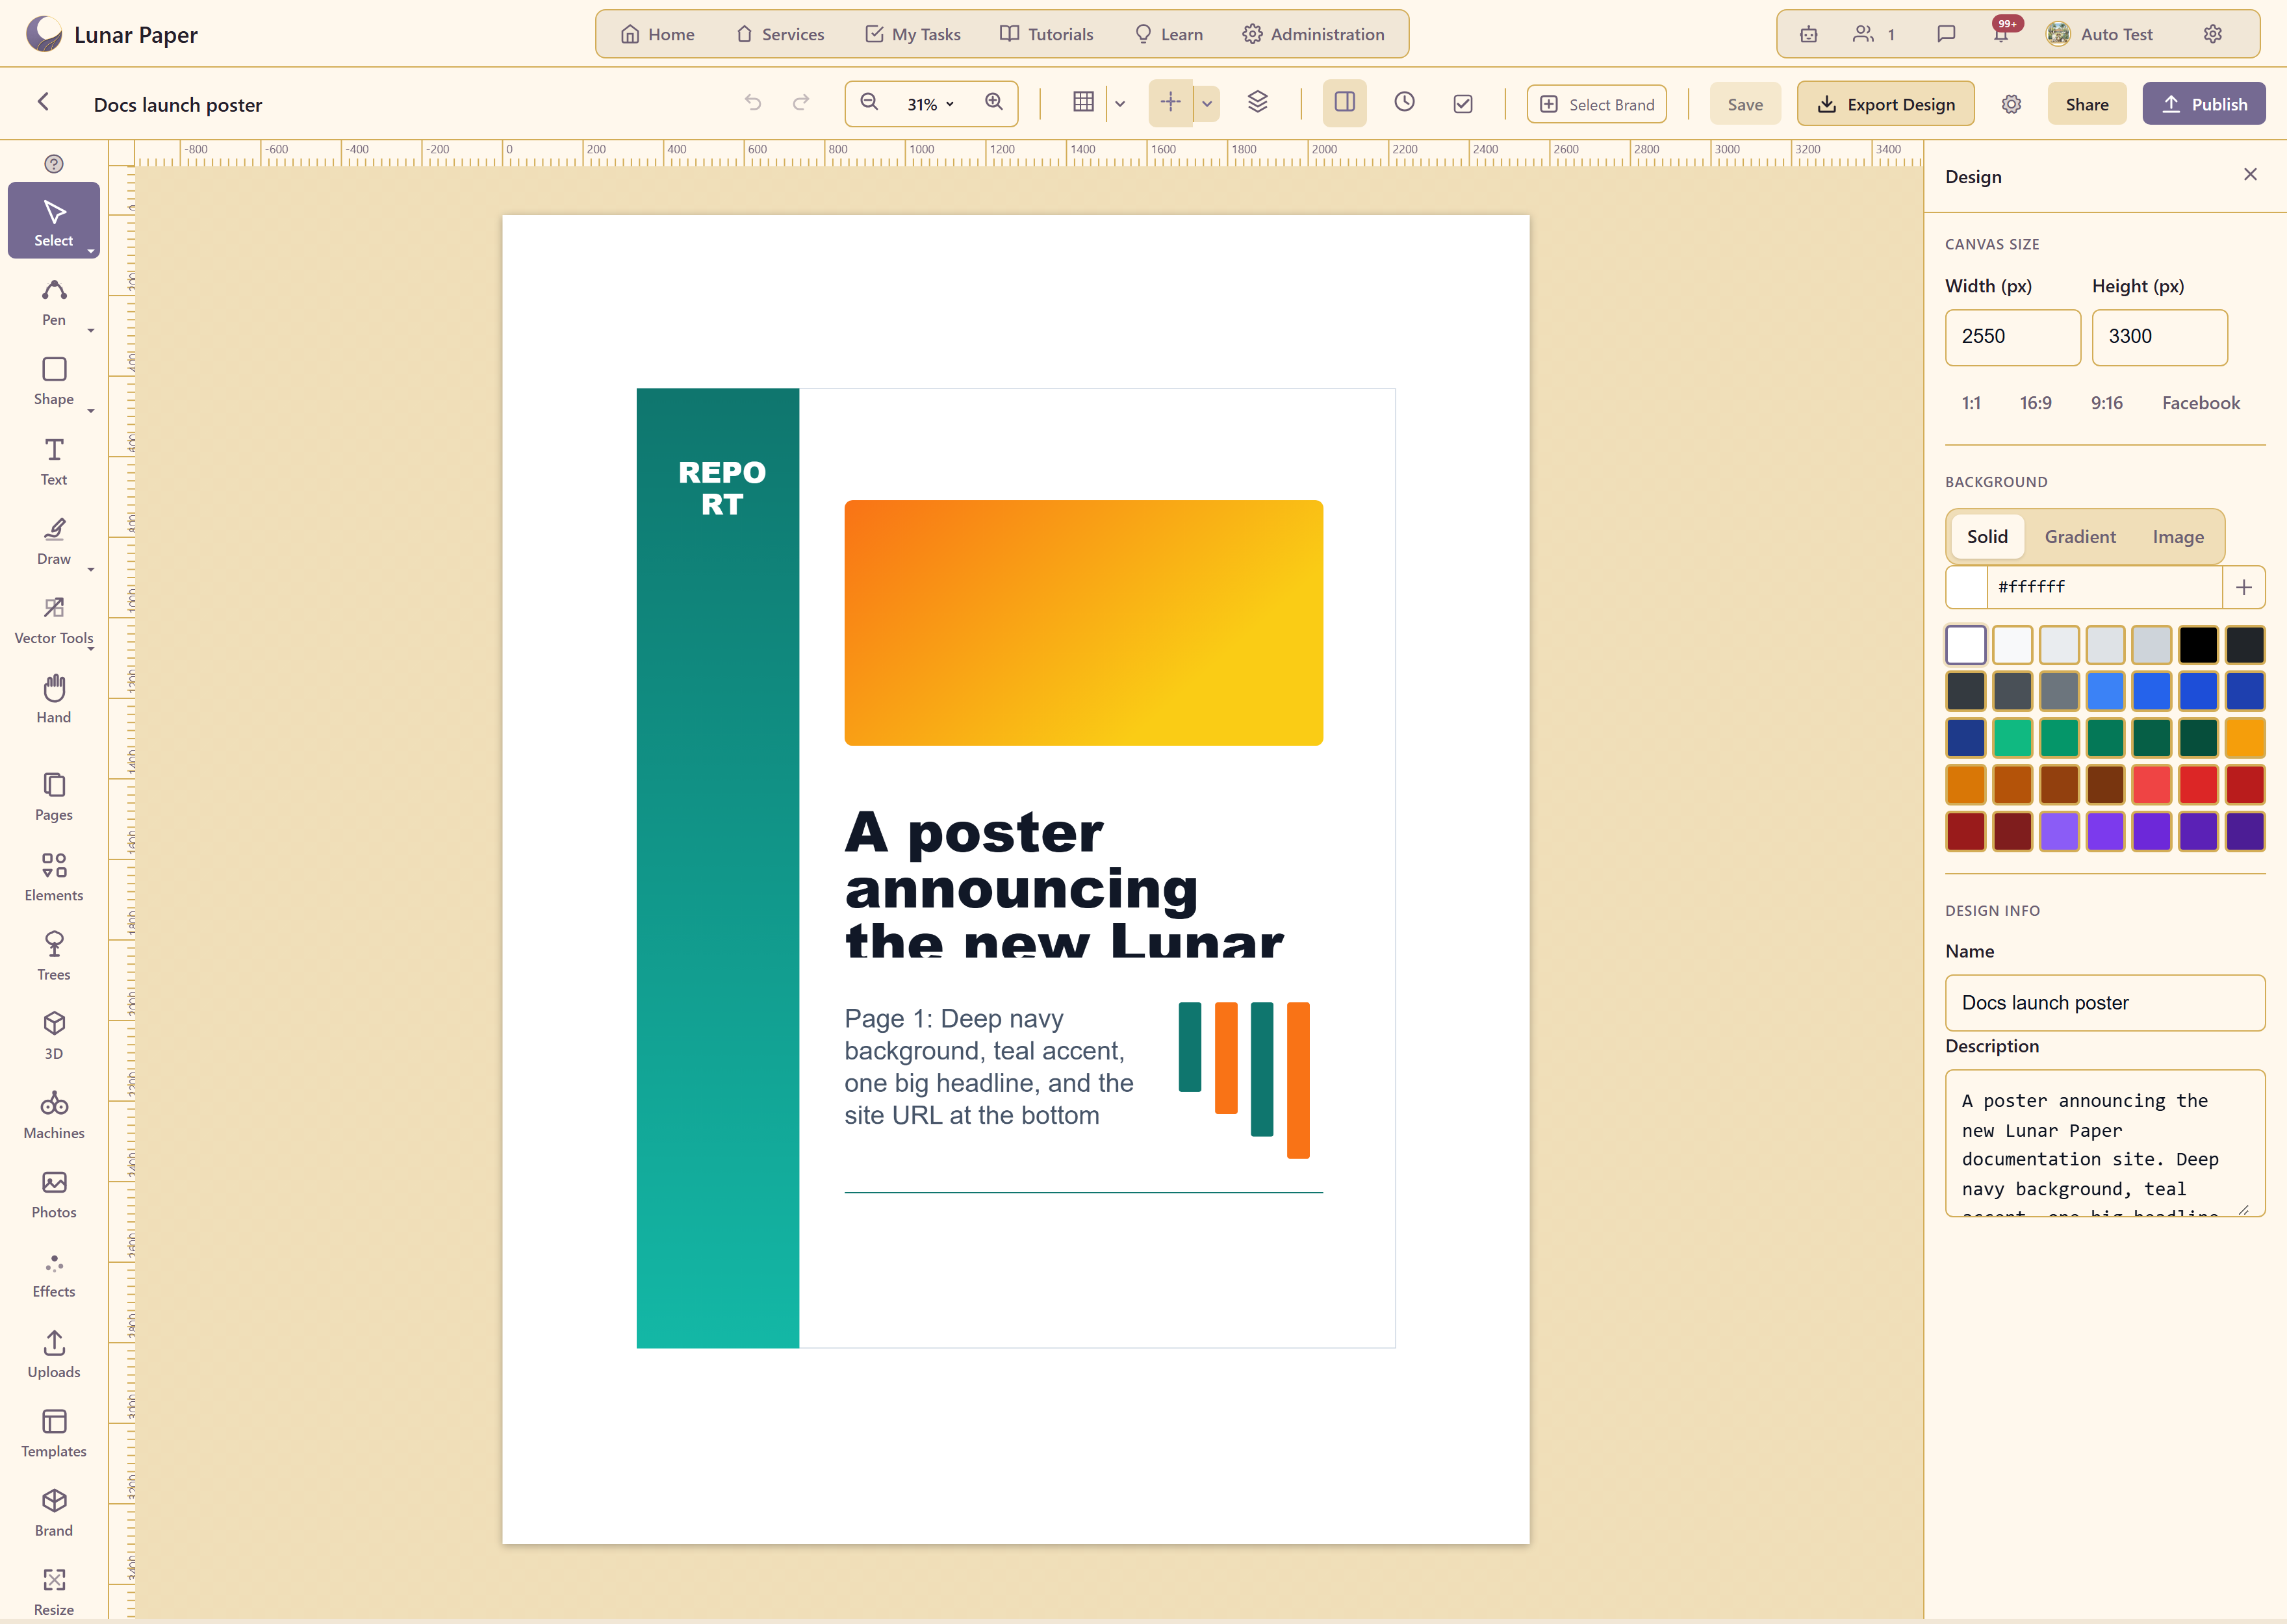
Two things drive everything: the tool you have active, which decides what a click does, and the properties panel, which changes to match whatever is selected.

The seven canvas tools
Section titled “The seven canvas tools”| Tool | Key | What a click or drag does |
|---|---|---|
| Select | V | Picks an element, moves it, resizes it by its handles |
| Pen | P | Places anchor points; drag while placing for a curve |
| Shape | R | Drags out a rectangle or other primitive |
| Text | T | Creates a text box where you click |
| Draw | B | Draws freehand as you move |
| Vector Tools | E | Edits the anchors and handles of an existing path |
| Hand | H | Pans the canvas without selecting anything |
Each has its own page under Tools. Learn V and H first. Most early frustration in a canvas tool is moving something you meant to scroll past, and the hand tool removes that failure entirely.
Drawing a shape
Section titled “Drawing a shape”Press R, then drag on the canvas. Release and the shape exists; press V and click it to select it.
The properties panel then fills with fill, stroke, corner radius, shadow, position, size, and rotation. Properties reference lists them all.
Two habits save time. Set the fill before duplicating a shape, because every copy inherits it. And use Unlink corners rather than drawing a custom path when you want three rounded corners and one square — it stays editable as a rectangle.
Working with text
Section titled “Working with text”Press T and click to place a text box, then type.
Select it with V and the panel offers fifteen fonts, six weights, alignment both horizontal and vertical, four kinds of spacing, a text stroke, and four case transforms.
Set the case transform rather than typing in capitals. The transform changes how the text displays while leaving what you typed intact, so the words stay editable and readable in the layer list.
The Pen places anchors one at a time; Draw produces a path from freehand movement; Vector Tools edits the anchors of an existing path.
Any shape can become a path through Convert to Path in its properties, described in the panel as editing individual anchor points and curves. That is the route from a rectangle to an arbitrary outline.
It is worth knowing this is effectively one-way: a converted rectangle gains anchor editing and loses corner radius, because a path has no corners to round.
Selecting and arranging
Section titled “Selecting and arranging”Layers in the toolbar shows the stacking order, and Properties toggles the right panel.
Every element carries position as X and Y and size as W and H in its properties, so anything that needs to be exact can be typed rather than dragged. That is the reliable way to align two elements that refuse to snap.
The eleven content panels
Section titled “The eleven content panels”Below a divider, the same rail holds eleven panels that supply content rather than draw it: Pages, Elements, Trees, 3D, Machines, Photos, Effects, Uploads, Templates, Brand, and Resize.
These do respond to a click, unlike the seven tools above the divider.
Grid, guides, and rulers
Section titled “Grid, guides, and rulers”Toggle Grid and Toggle Guides turn each on, with Grid settings and Ruler and guide settings alongside.
Turn the grid on while placing and off while judging. It is an alignment aid, and it flatters a layout for as long as it is visible.
Zoom Out, a percentage, and Zoom In. A print design opens well below 100% — the example poster opens at 31% — so check type at full size before deciding it is too small.
Finding a control
Section titled “Finding a control”Find a tool searches the interface. With seven tools, eleven panels, and a contextual properties panel, it is quicker than hunting.
Related
Section titled “Related”Properties reference lists every control by element type. Add elements covers the panels that supply content.